
Getting Started
This page will guide you through the process of using the Rewards system to incentivize user engagement with Decentraland Wearables and Emotes. You’ll learn how to set up and manage a rewards campaign, including creating a campaign, adding items to the campaign stock, managing funds, and using dispensers to deliver rewards. Additionally, you’ll find instructions for activating your campaign and handling transaction fees.
Prerequisites #
Before you begin using the Rewards system, ensure that you have a collection approved and ready for minting . This collection should contain the items you plan to offer as rewards in your campaign.
Create your first campaign #
A campaign refers to an incentive initiative designed to boost user engagement through reward offerings. In this section, you’ll discover the campaign configuration details, along with the prerequisites for initiating the distribution of rewards.
- Access the Rewards dApp
- Connect your wallet
- Click on the Campaigns tab
- Click on the Create Campaign button. You will be redirected to the campaign creation form.
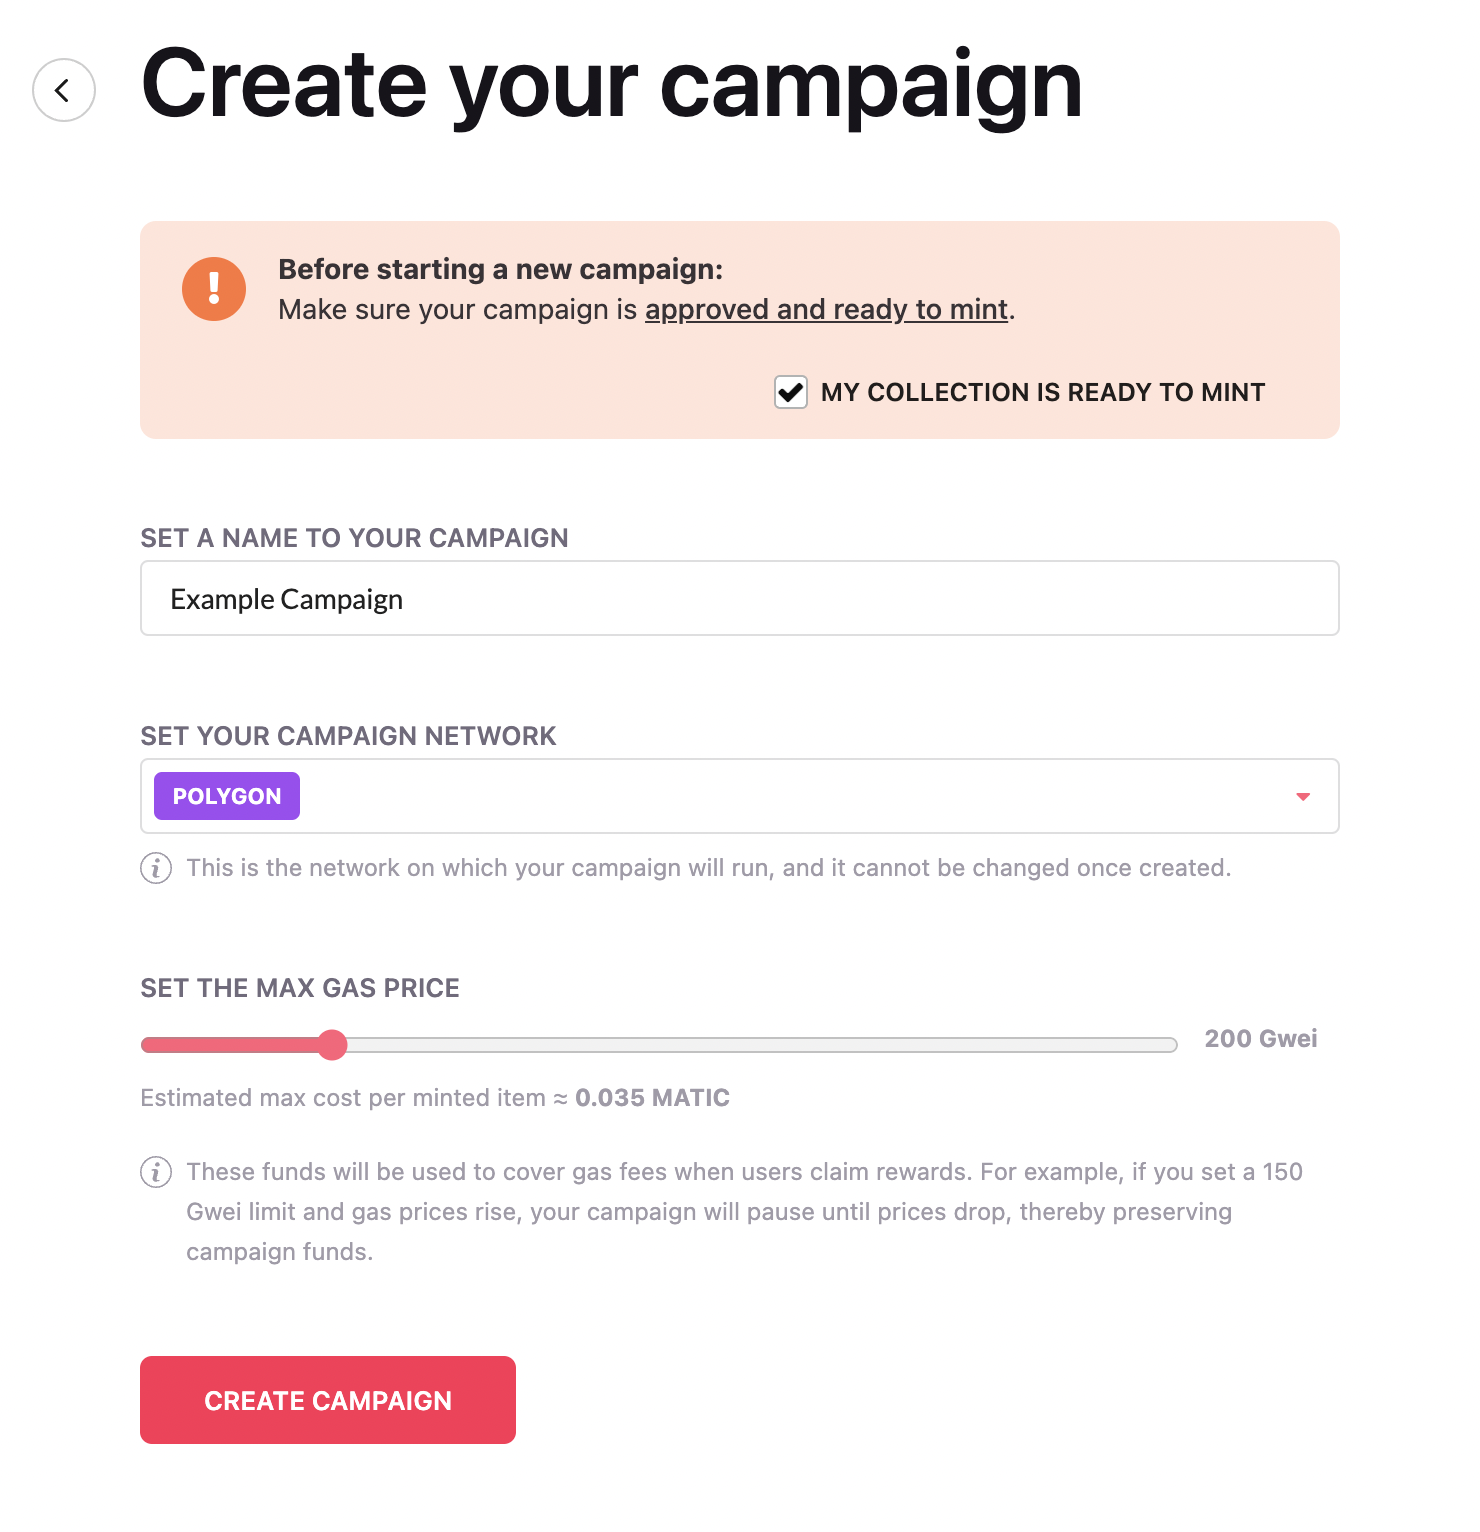
- Complete the following fields:
- Campaign Name: Choose a name for your campaign. This name will be visible to users on their rewards page.
- Campaign Network: Select the network where your wearables will be minted. Note that this choice is final and cannot be changed once the campaign is created.
- Max Gas Price: Set the maximum gas price you’re willing to pay per transaction. If a transaction’s gas price exceeds this limit, it will be deferred until the price drops. The UI will provide an estimate of the cost to mint each item based on this setting.
- Click the Create Campaign button. You will be redirected to the campaign page..
After creating your campaign, there are a few more steps to complete before you can start delivering rewards:
- Add a Supply of MATIC Tokens: Ensure you have enough MATIC tokens in your account to cover transaction fees.
- Add Items to the Campaign Stock: Populate your campaign with the items you plan to offer as rewards.
- Create a Dispenser: Set up a dispenser that will handle the distribution of rewards to users.
- Activate Your Campaign: Finally, activate your campaign to make it live and start delivering rewards.
Add MATIC to pay for transaction fees #
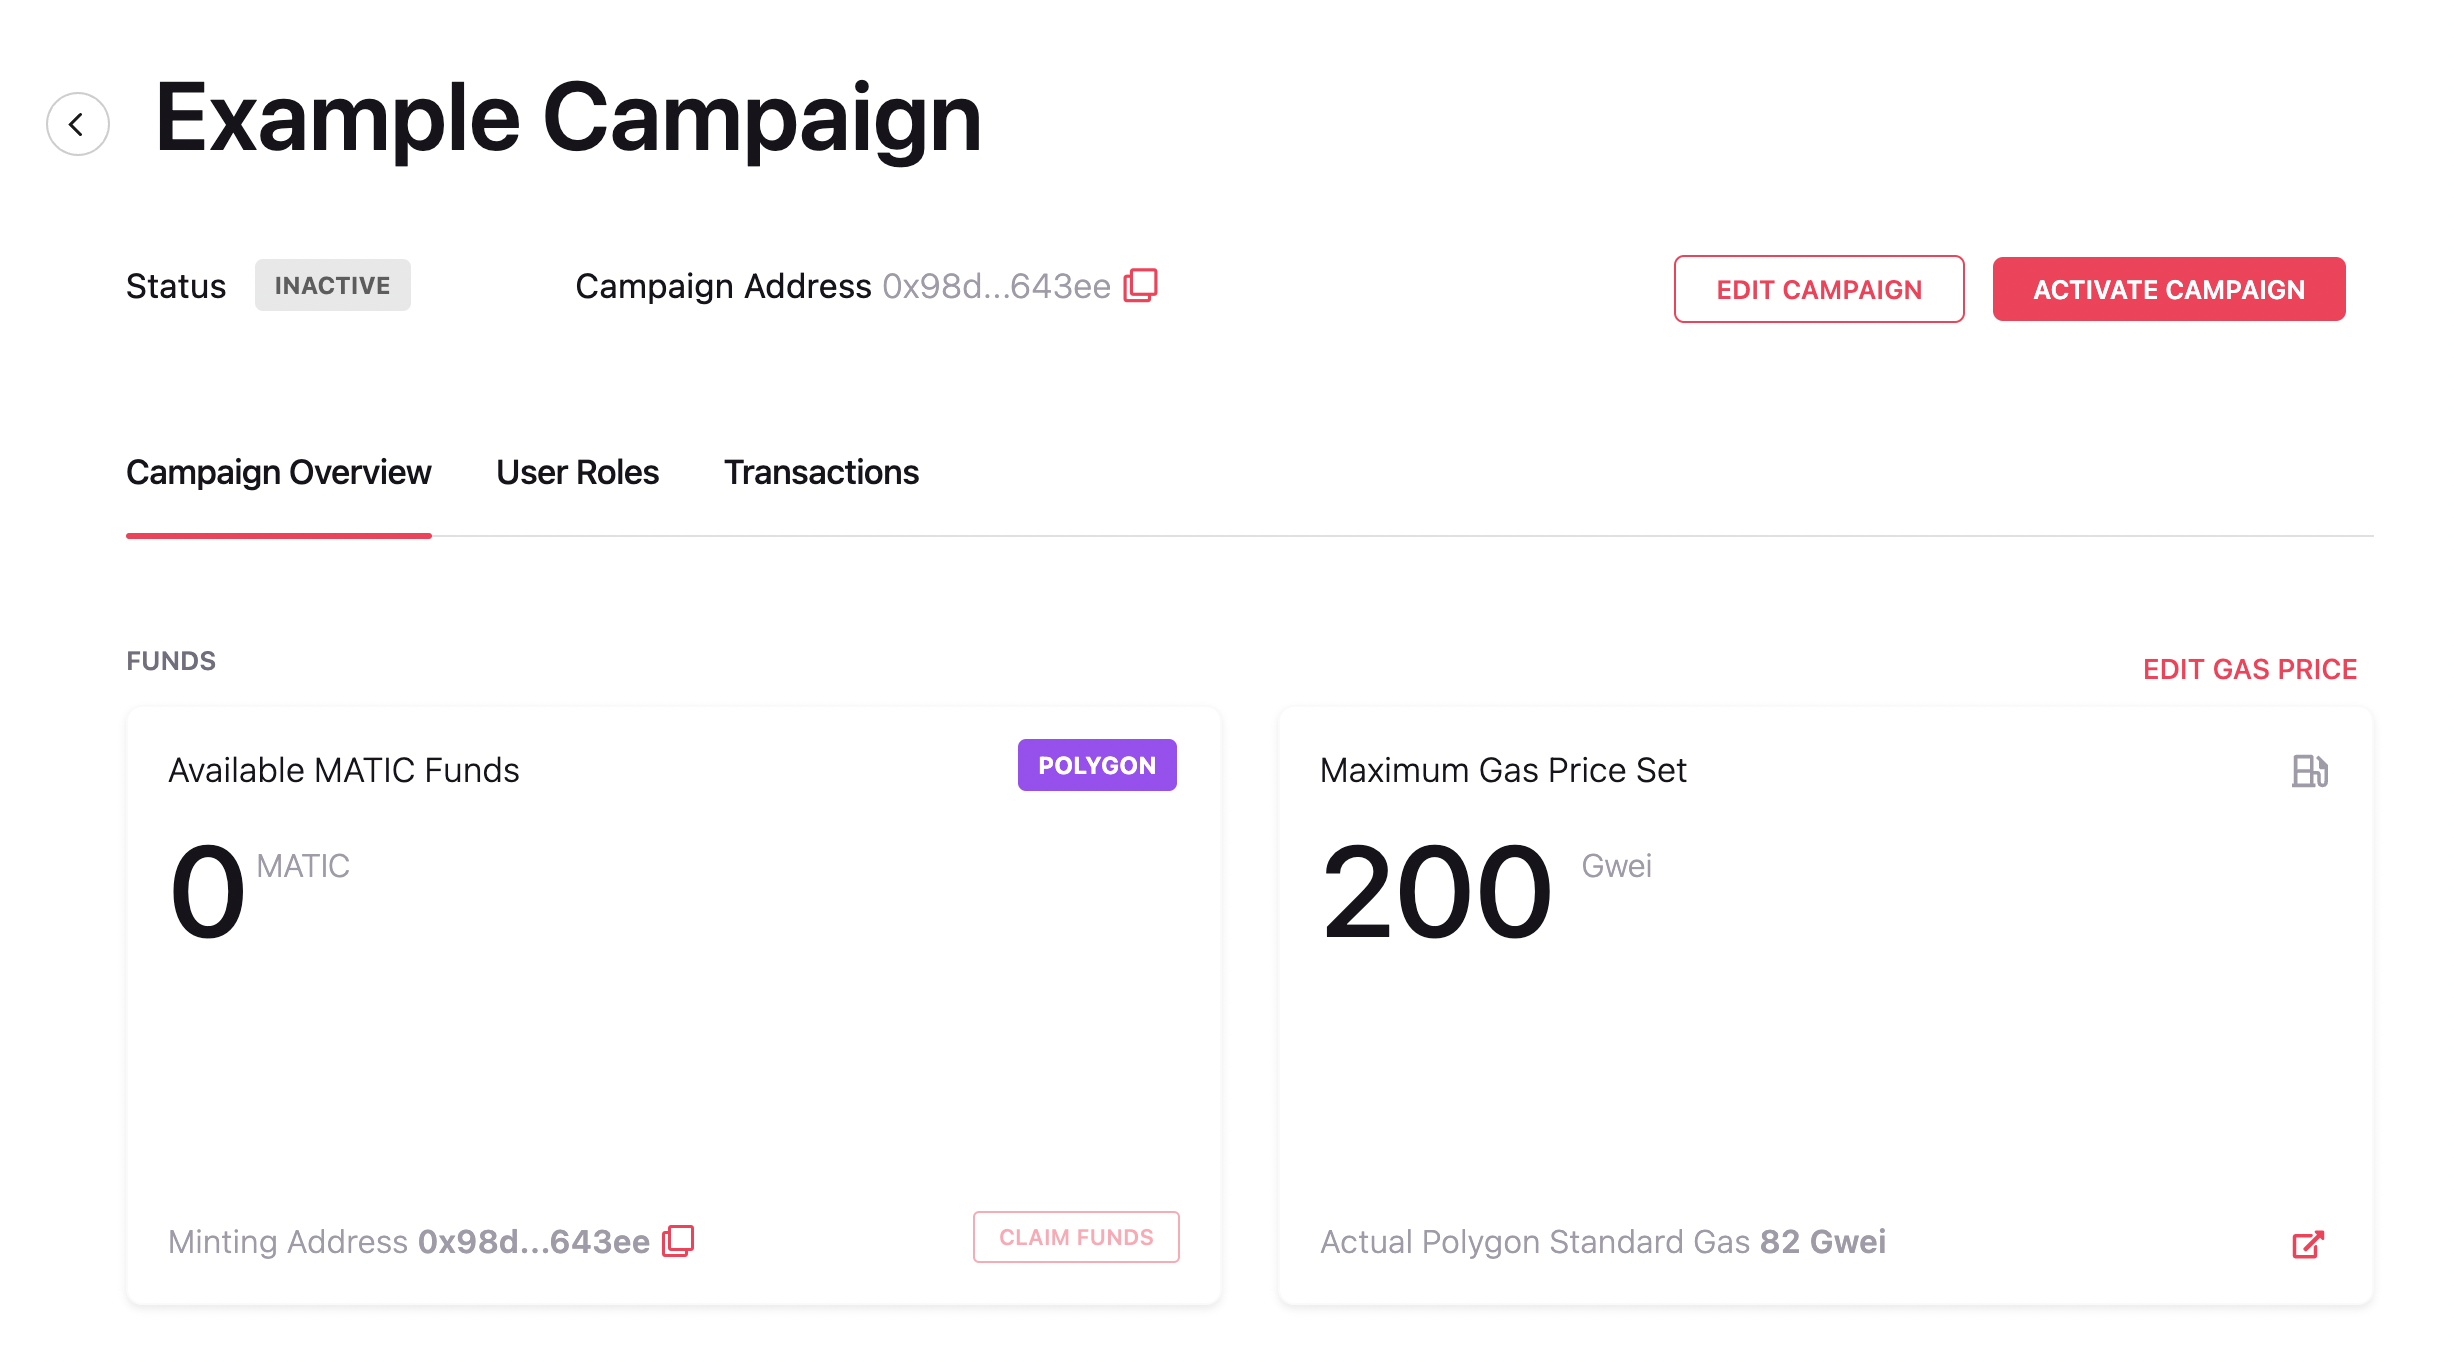
To mint items, you’ll need to cover the transaction fees by adding a supply of MATIC tokens to your campaign’s address. You can find this address listed below the campaign name.
To transfer MATIC from your wallet, first, ensure you’re connected to the same network as the campaign. Then, copy the campaign address and send the desired amount of MATIC to it. If you don’t have any MATIC in your wallet, you can follow this guide to acquire some.
💡 Tip: For campaigns running on the test AMOY network, you can obtain some MATIC from this faucet .
To send MATIC from an exchange you just need to withdraw MATIC token to the Polygon Network (usually Amoy Network is not available on exchanges).
Add items to the campaign stock #
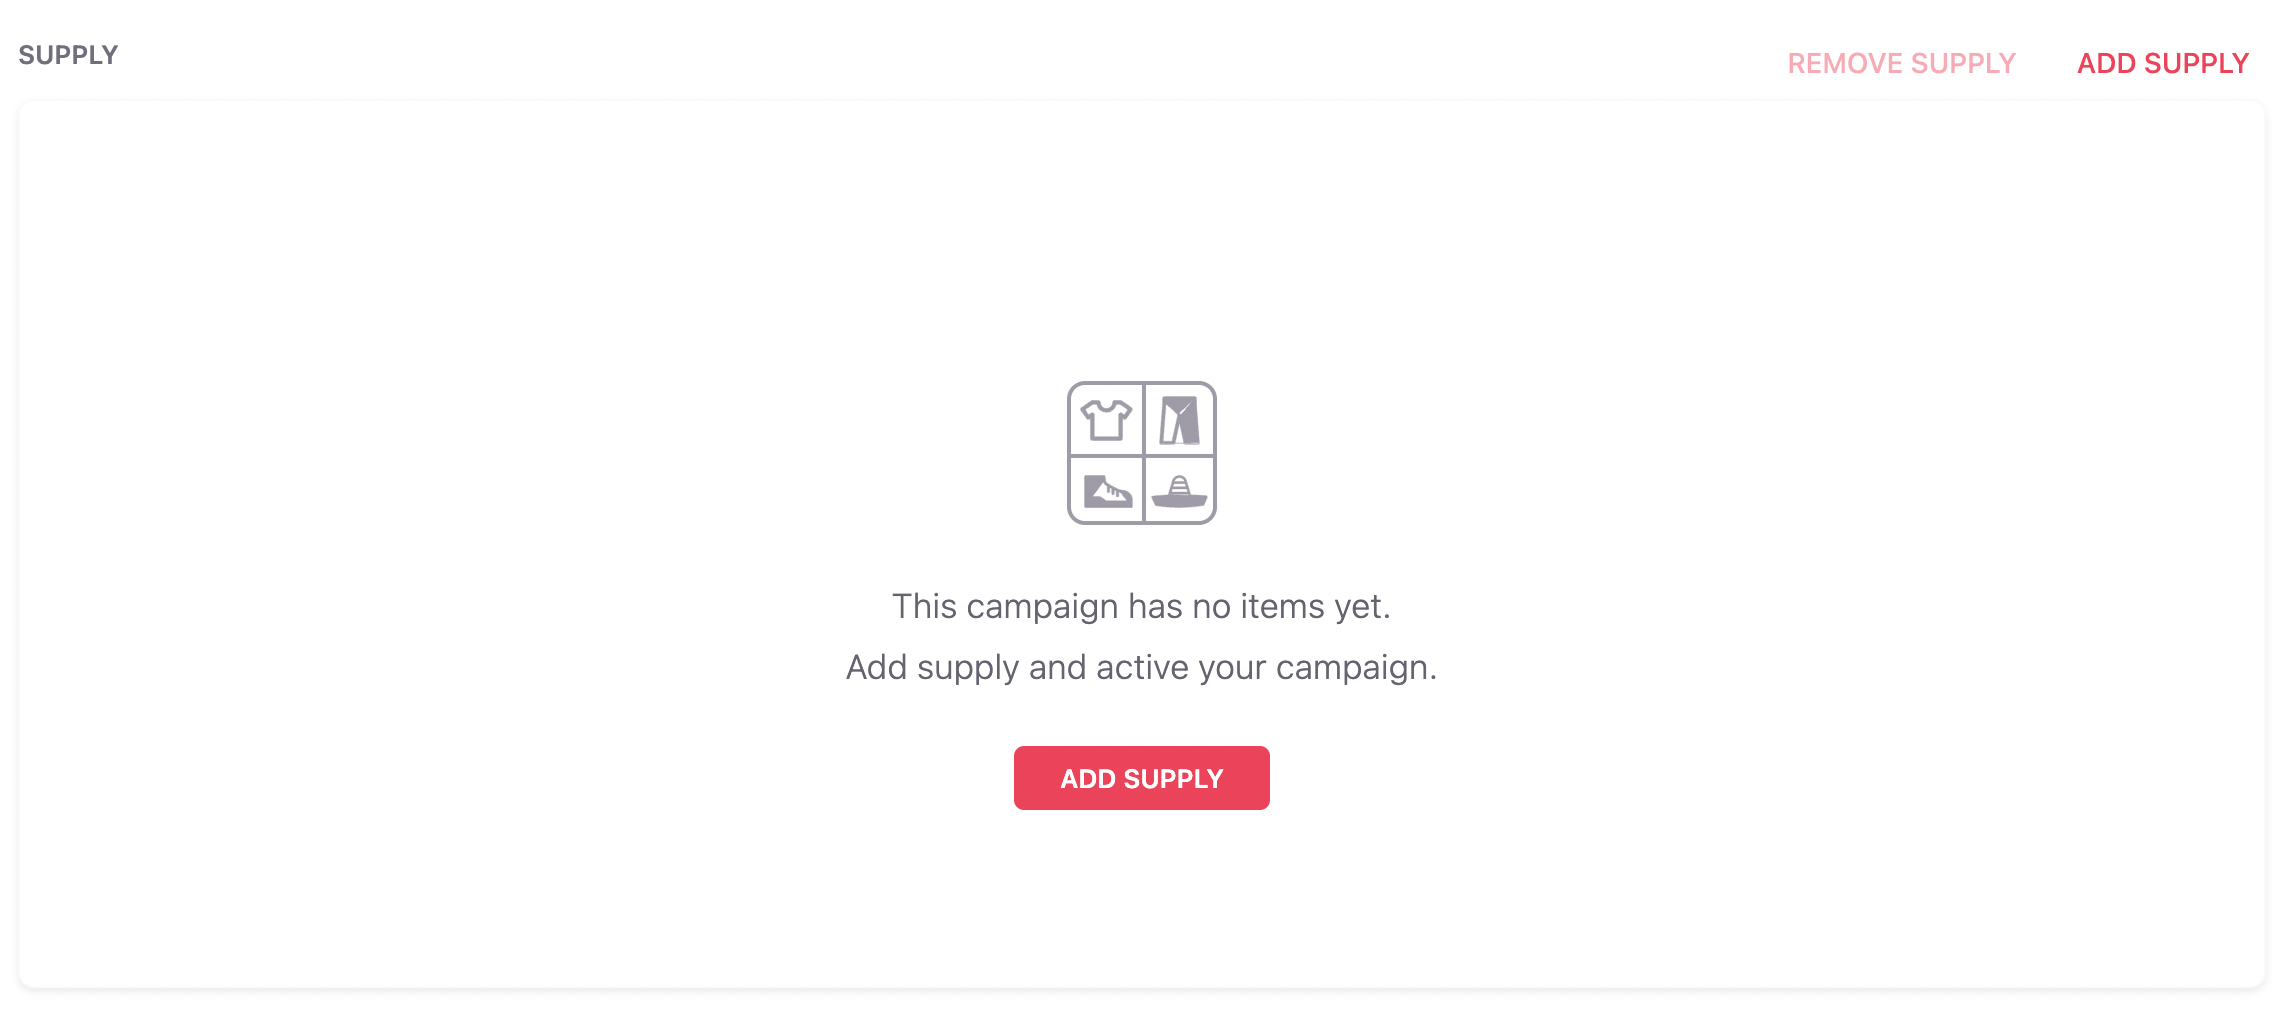
When you create a new campaign, it starts with an empty inventory. To begin delivering rewards, you’ll need to add items to the campaign:
-
Grant Minting Permissions: First, authorize the campaign to mint items. Follow this guide and use the campaign address (located below the campaign name) as the minter’s address. After submitting, wait for the transaction to be confirmed.
-
Add Items to the Campaign Stock: Once minting permissions are granted, you can start adding items to the campaign’s inventory.
a) Click on the Add Supply button to view all collections for which the campaign has minting permissions.
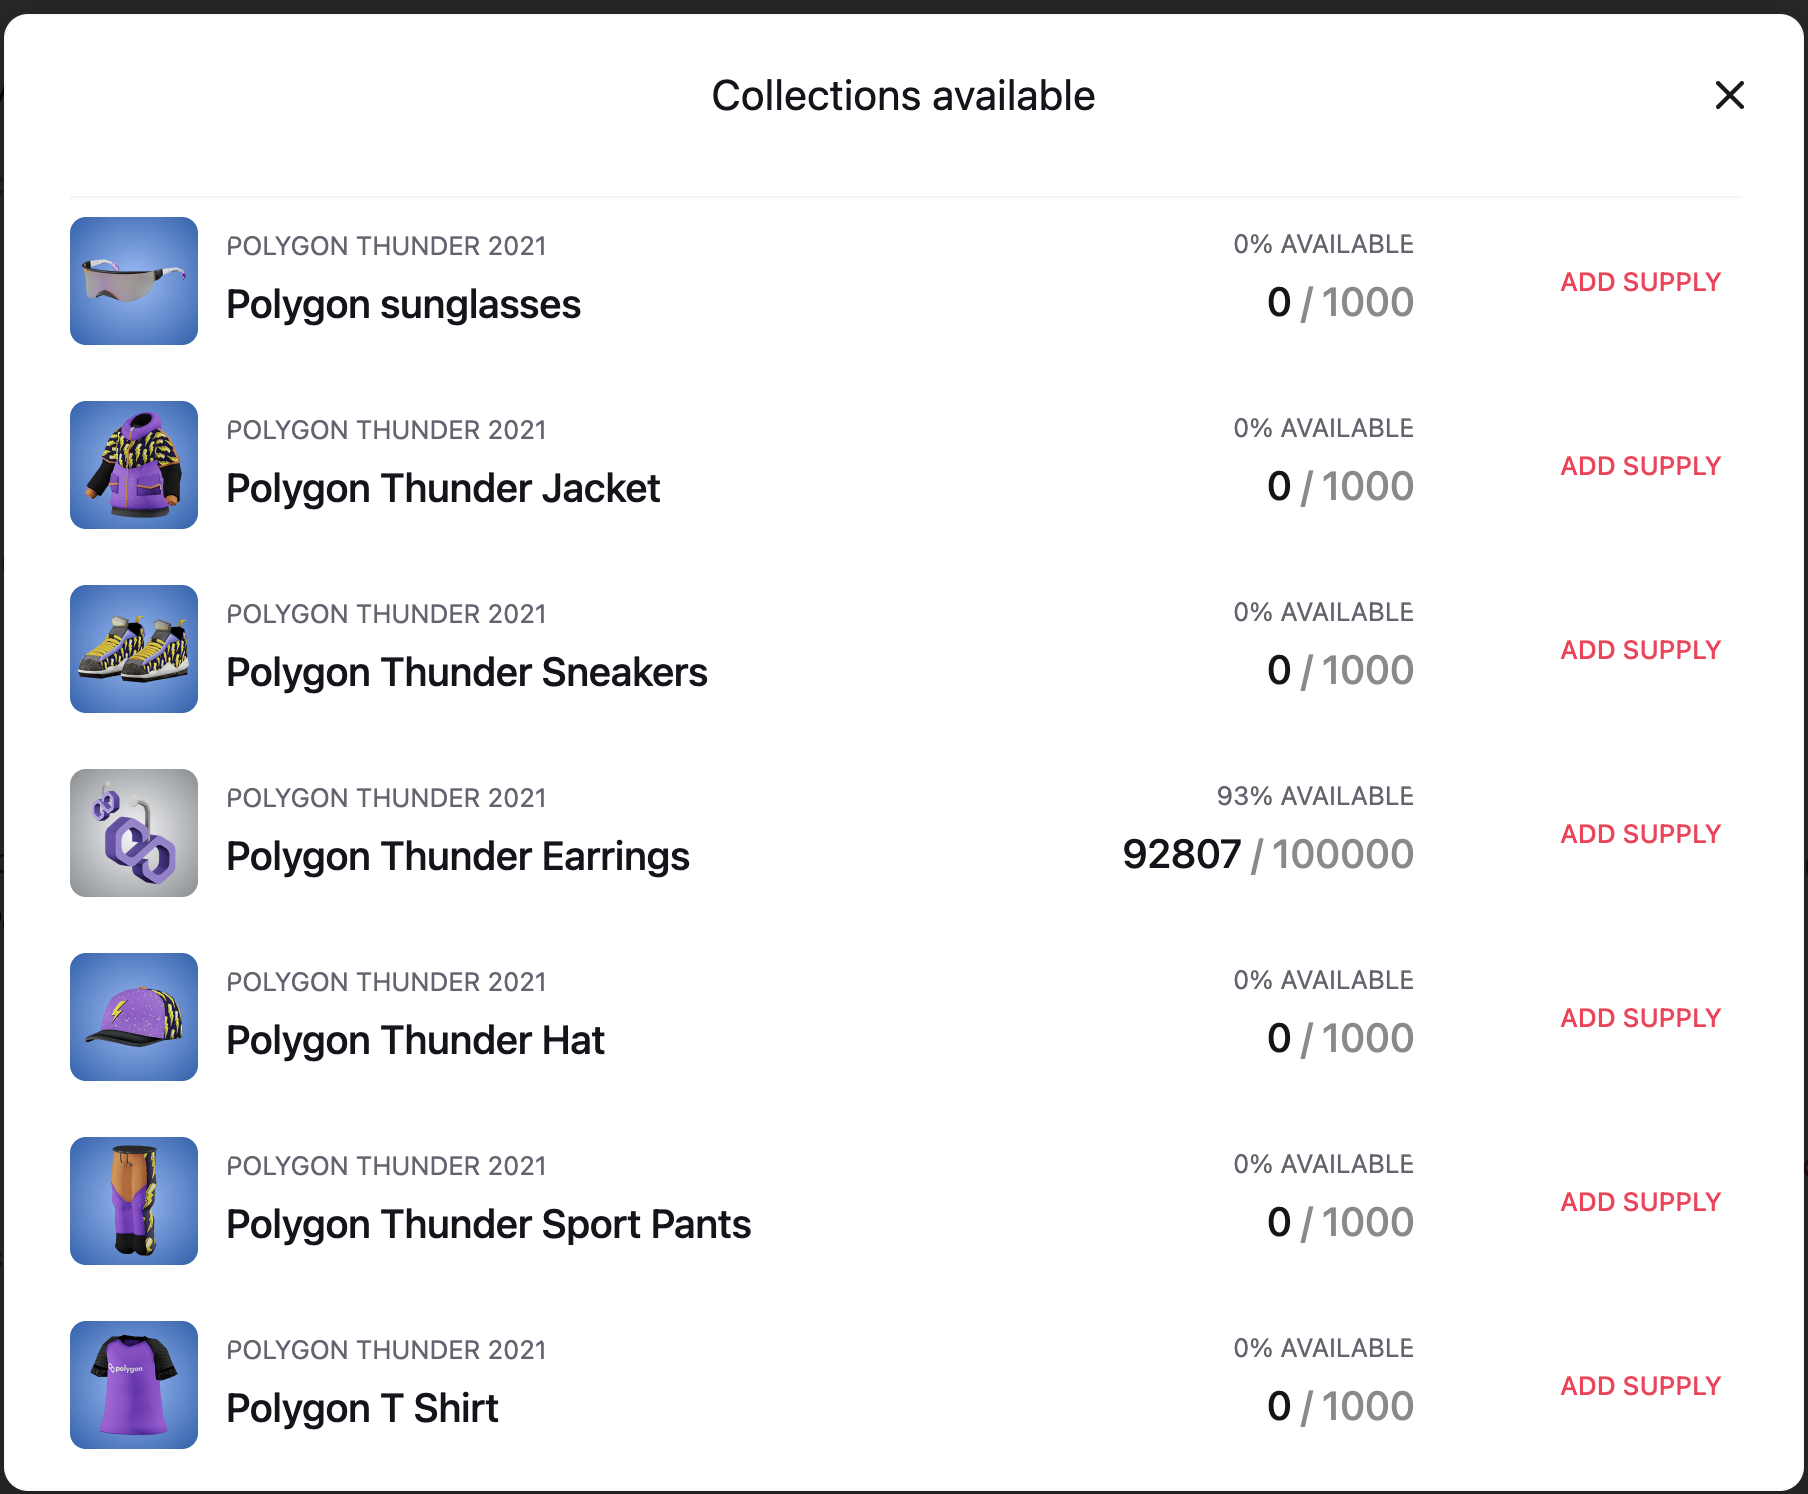
b) Select the item from the collection that you want to add to the stock, then click on the **Add Supply** button.

c) Select the amount of items you want to add to the campaign stock and click on the **Add supply** button.

Priority and Group fields are advance features that will be covered in a dedicated section.
Create a dispenser to deliver the rewards #
Dispensers are the tools used to send or claim rewards from your stock. Each dispenser is associated with a unique key, which is required for authentication with the HTTP API. Although the key is not displayed in the UI, you can copy it by clicking the Copy button.
When you create a new campaign, a default dispenser with a master key is automatically provided for testing purposes only. To set up a new dispenser, click the Add Dispenser button.
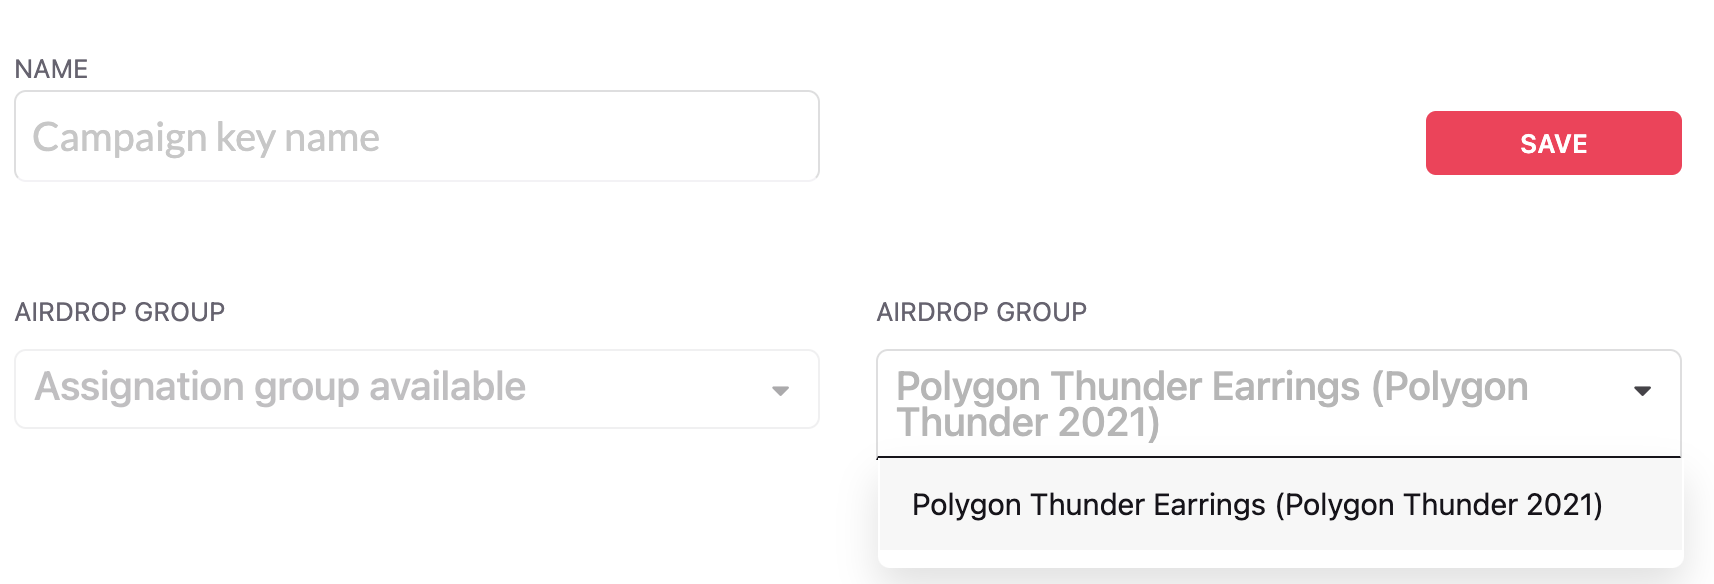
Select the item group where you want take items from, and click on the Save button.
Dispenser have some configuration options that will be covered in a dedicated section.
Activate your campaign #
By default your campaign is inactive. This prevents the rewards service from assigning any new rewards. To activate your campaign, click on the Activate campaign button.
📔 Note: If an active campaign is set to inactive, any pending rewards will still be sent. However, new claims or claims that need to be retried for some reason will be prevented.
Now you are ready to start minting wearables/emotes using the API
Manage funds #
Once the campaign is completed, if there are remaining funds from the transaction fees, the owner can choose to either reclaim the funds or reassign them to another campaign. To reclaim funds, simply click the Manage Funds button on the campaign detail page.
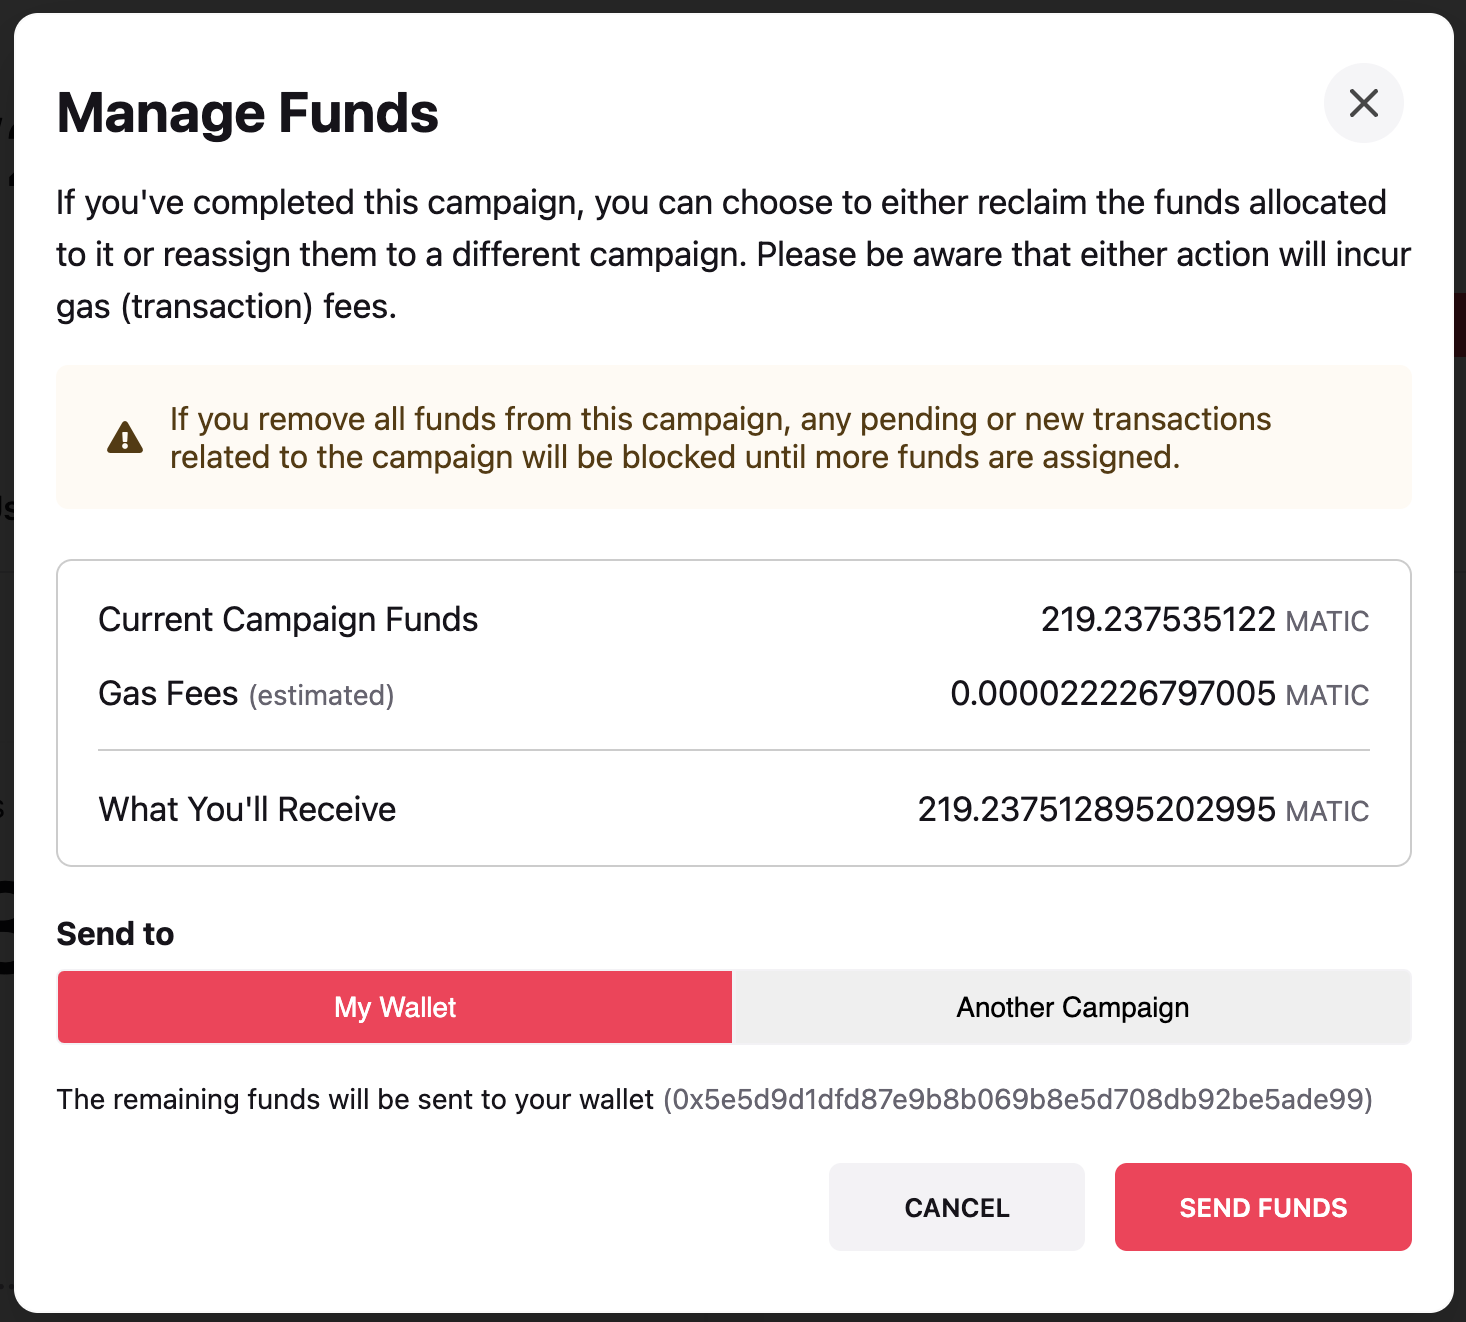
📔 Note: If all funds are removed from a campaign, any pending or new transactions related to that campaign will be blocked until more funds are assigned.