Meshes
3D models have a mesh composed of triangular faces. These faces meet each other on edges (the lines along which they touch) and vertices (the points where their corners join).
Space Limitations #
All 3D models in your scene must fit within the limits of its parcels. If they extend beyond these limits when running a preview, the meshes will be marked in red by a bounding box.
For performance reasons, Decentraland checks the positions of the bounding boxes around meshes (not the vertices in the meshes themselves) to verify that they are within the scene’s limits.
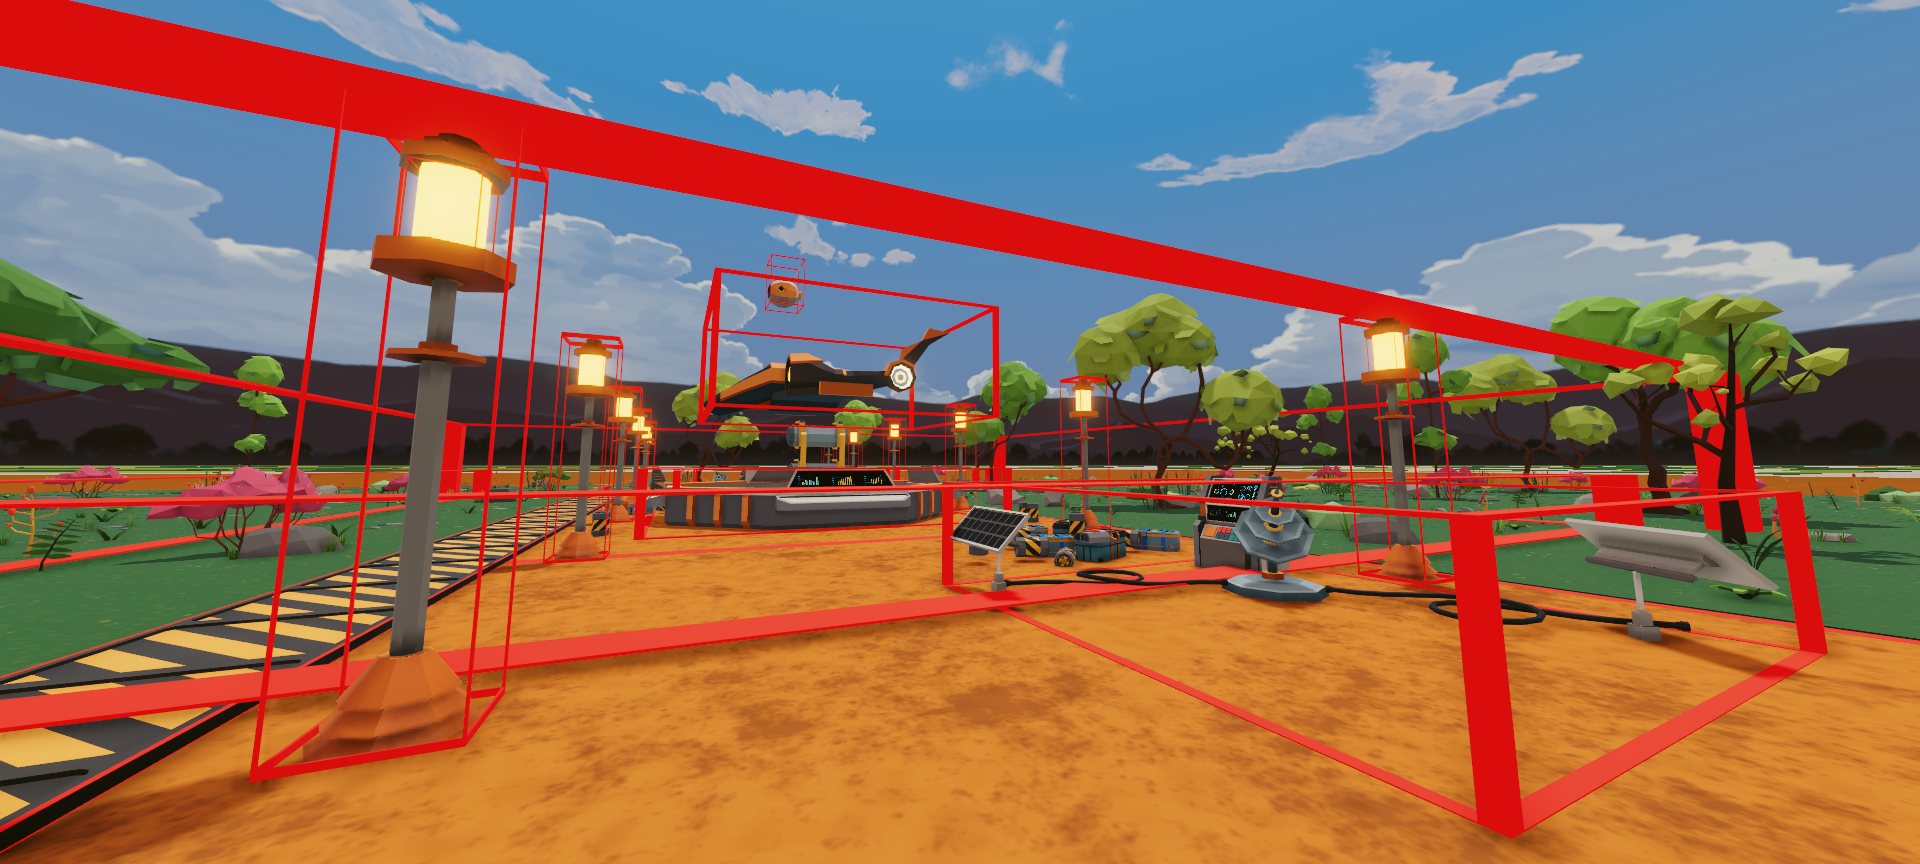
If you have a model that has all of its vertices neatly inside the scene area, but that has large bounding boxes that are mostly empty and extend beyond the scene limits, the entire model will be marked as outside the scene limits.
To avoid this problem, you can clean up your 3D models to reset positions and rotations of meshes so that bounding boxes don’t extend beyond the meshes they wrap.
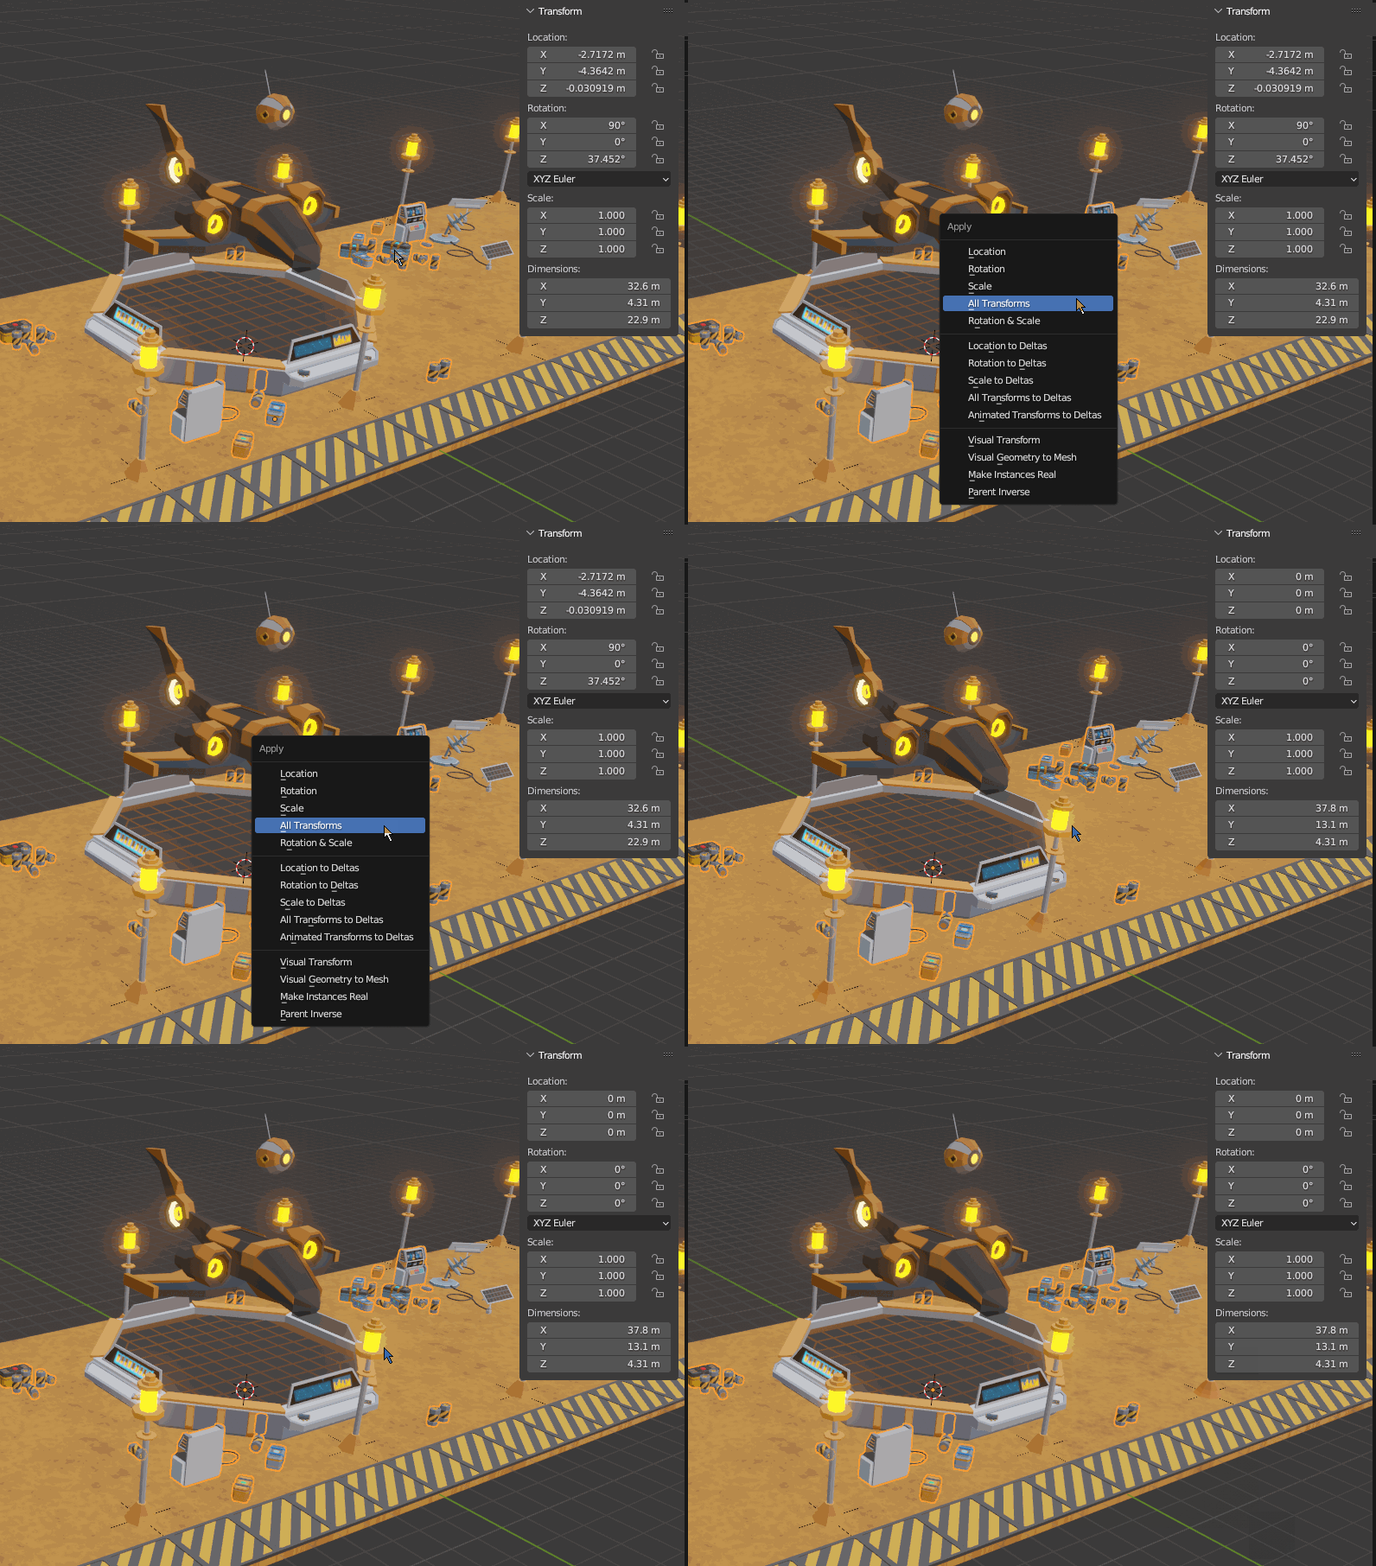
On Blender you can do that by selecting the objects, pressing Ctrl+A and then Apply “All transforms”.
Bounding Boxes #
Every mesh has a bounding box, that surrounds the limits of the shape. Keep in mind that the bounding boxes of all 3D models in a Decentraland scene must fit inside the scene limits, see position entities for more details.
To make a 3D model more usable inside Decentraland, make sure that its bounding boxes don’t extend beyond the model more than necessary.
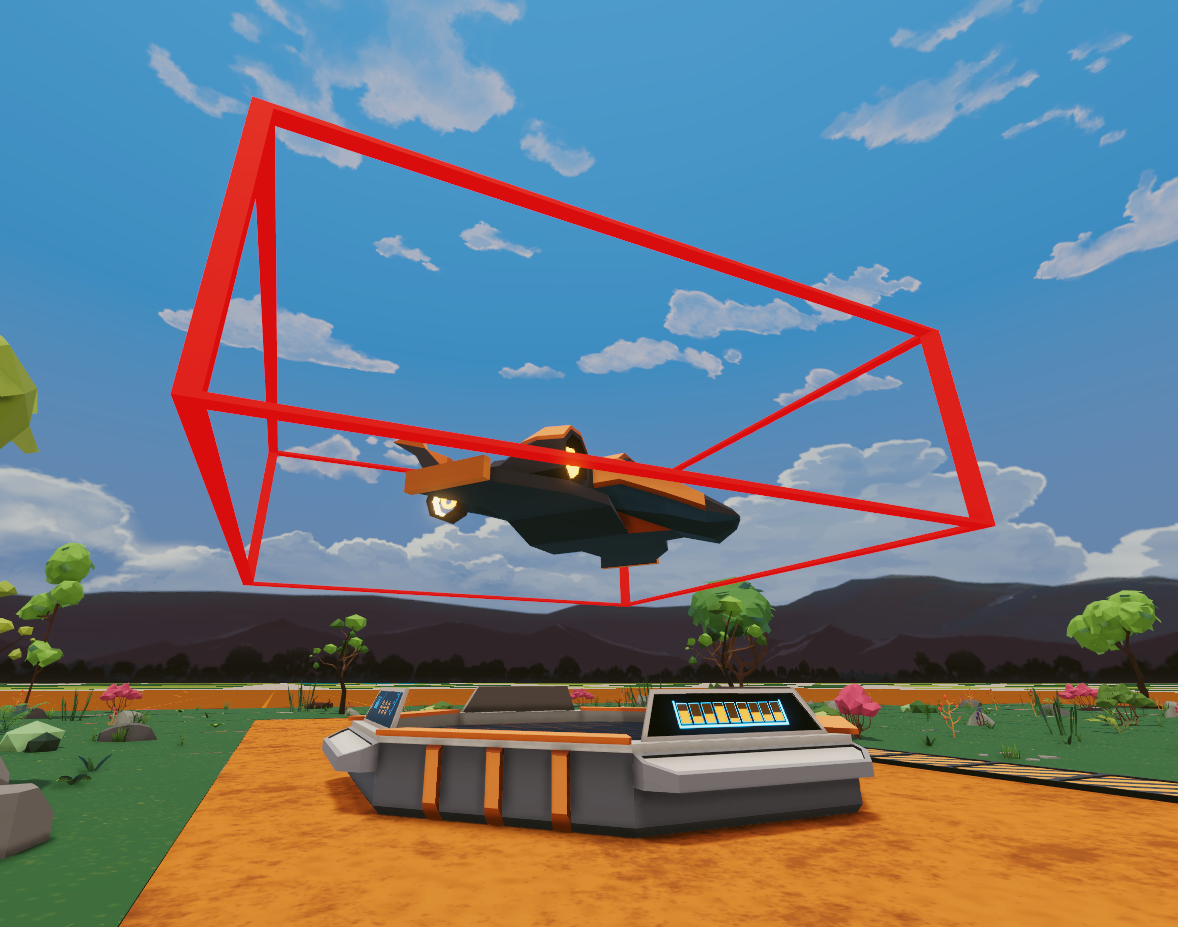
For example, be cautious when rotating a sub-mesh near the border of your model. Since bounding boxes are cubes, even if the mesh is round, the corners of its bounding box might end up sticking out after rotating it 45°.
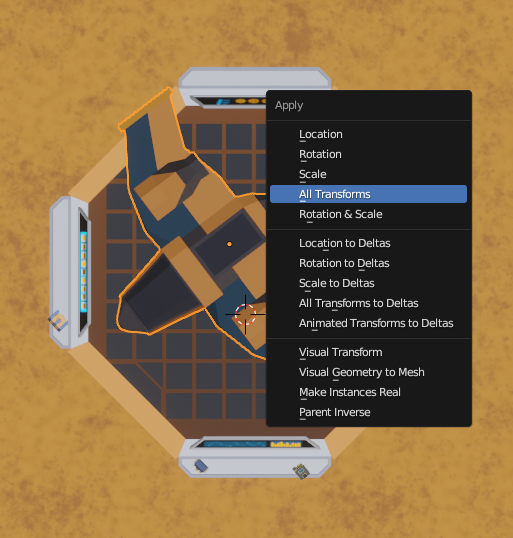
We recommend that you bake the rotation and scale of every mesh in the model, to make sure that there are no unwanted bounding boxes extending beyond the size they need to have.
Triangle Limitations #
Because Decentraland is an open world full of different scenes and objects that are being downloaded on the fly (in the same 3D space) is important to optimize our meshes in order to have a good performance while playing. In that sense, there are some scene limitations that we always need to keep in mind when it comes to meshes:
n represents the number of parcels that a scene occupies.
- Triangles: n x 10000 Total amount of triangles for all the models in the scene.
- Height: log2(n+1) x 20 Height in meters.
- File size: 15 MB per parcel - 300 MB max Total size of the files uploaded to the content server. Includes 3D models and audio. Doesn’t include files that aren’t uploaded, such as node.js packages.
- Max file size 50 MB per file No individual file of any type in the scene can exceed 50 MB, no matter how many parcels the scene has.
For more information check all the scene limitations here.
🔥Optimization Tip🔥: Add Polygon Count A valuable tip is to always keep on track of the polycount of your models. To do that in blender you need to turn on statistics on the viewport overlays panel.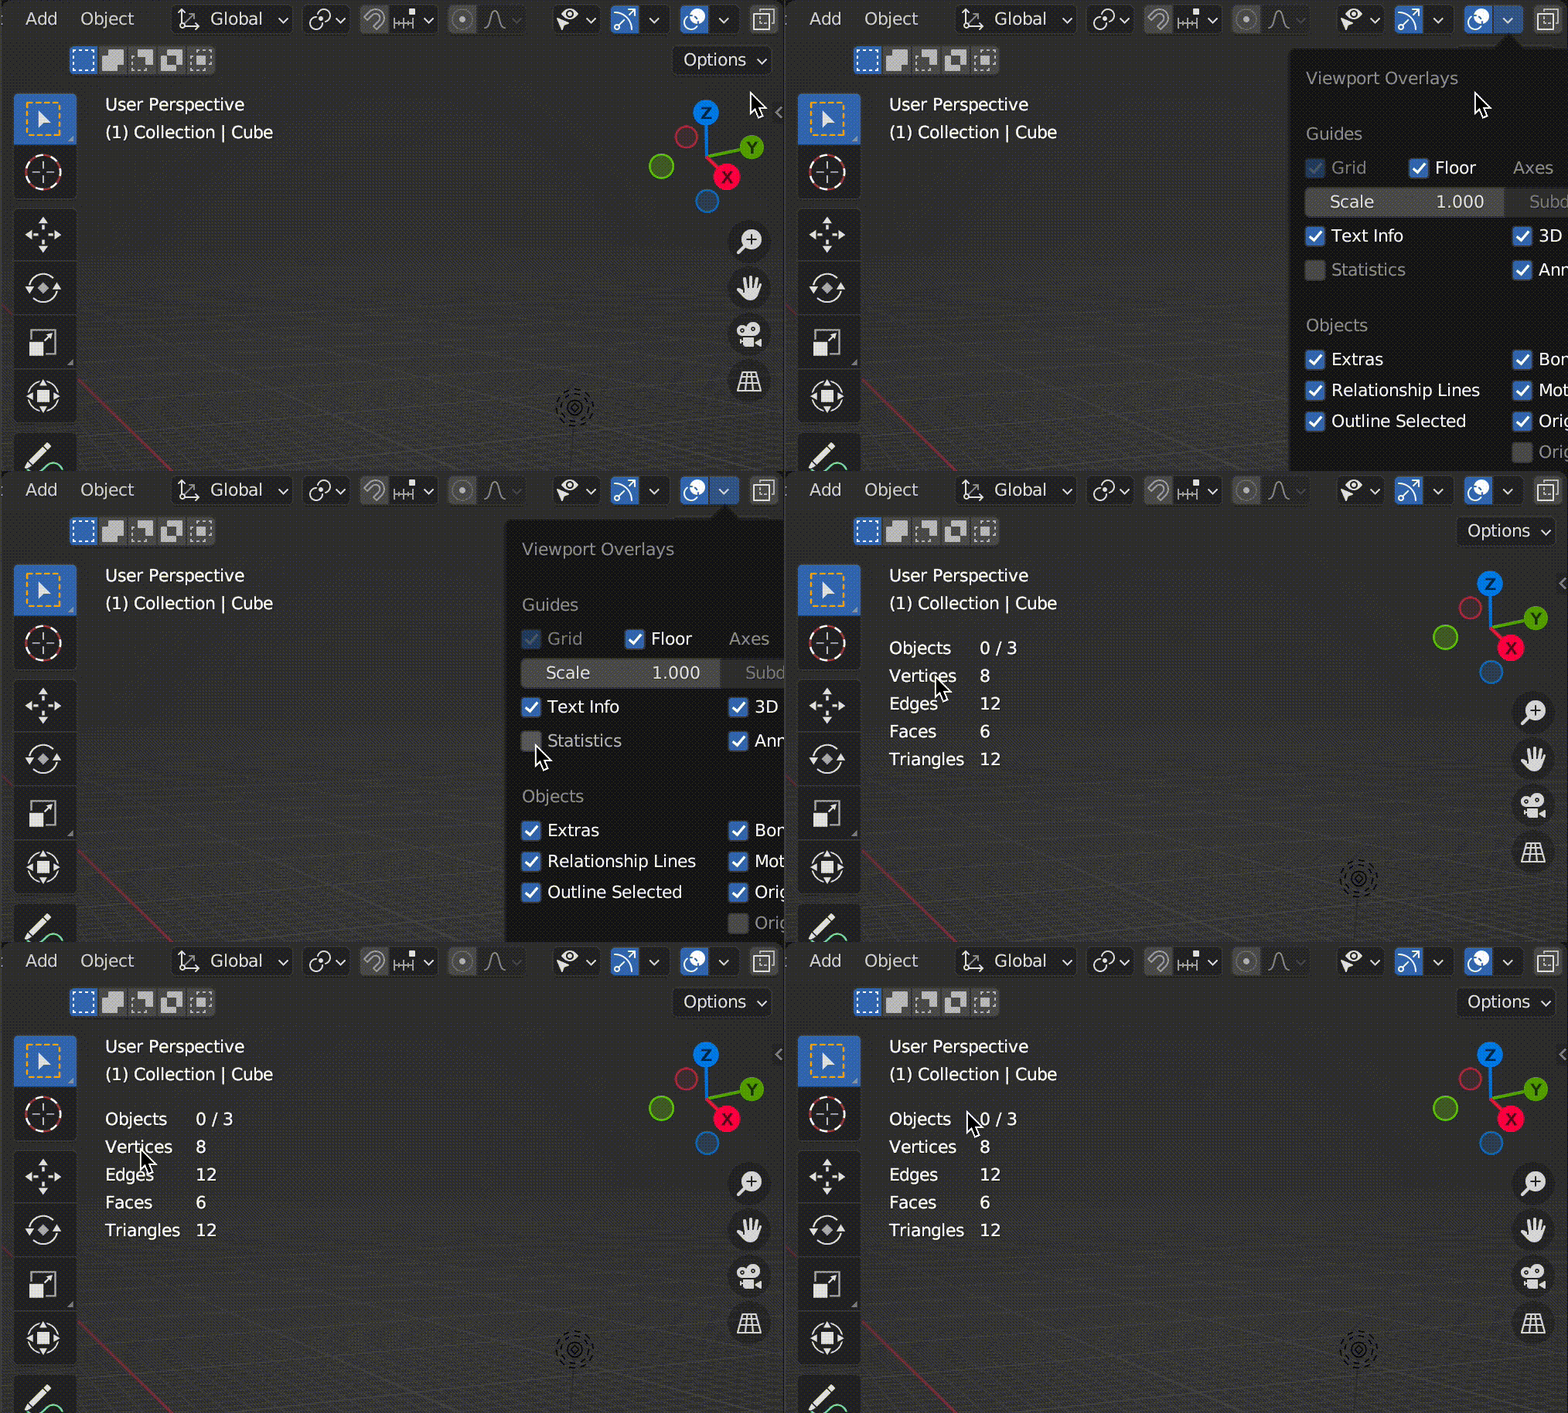
Meshes On Large Scenes #
When creating meshes, we should keep in mind these 2 best practices:
-
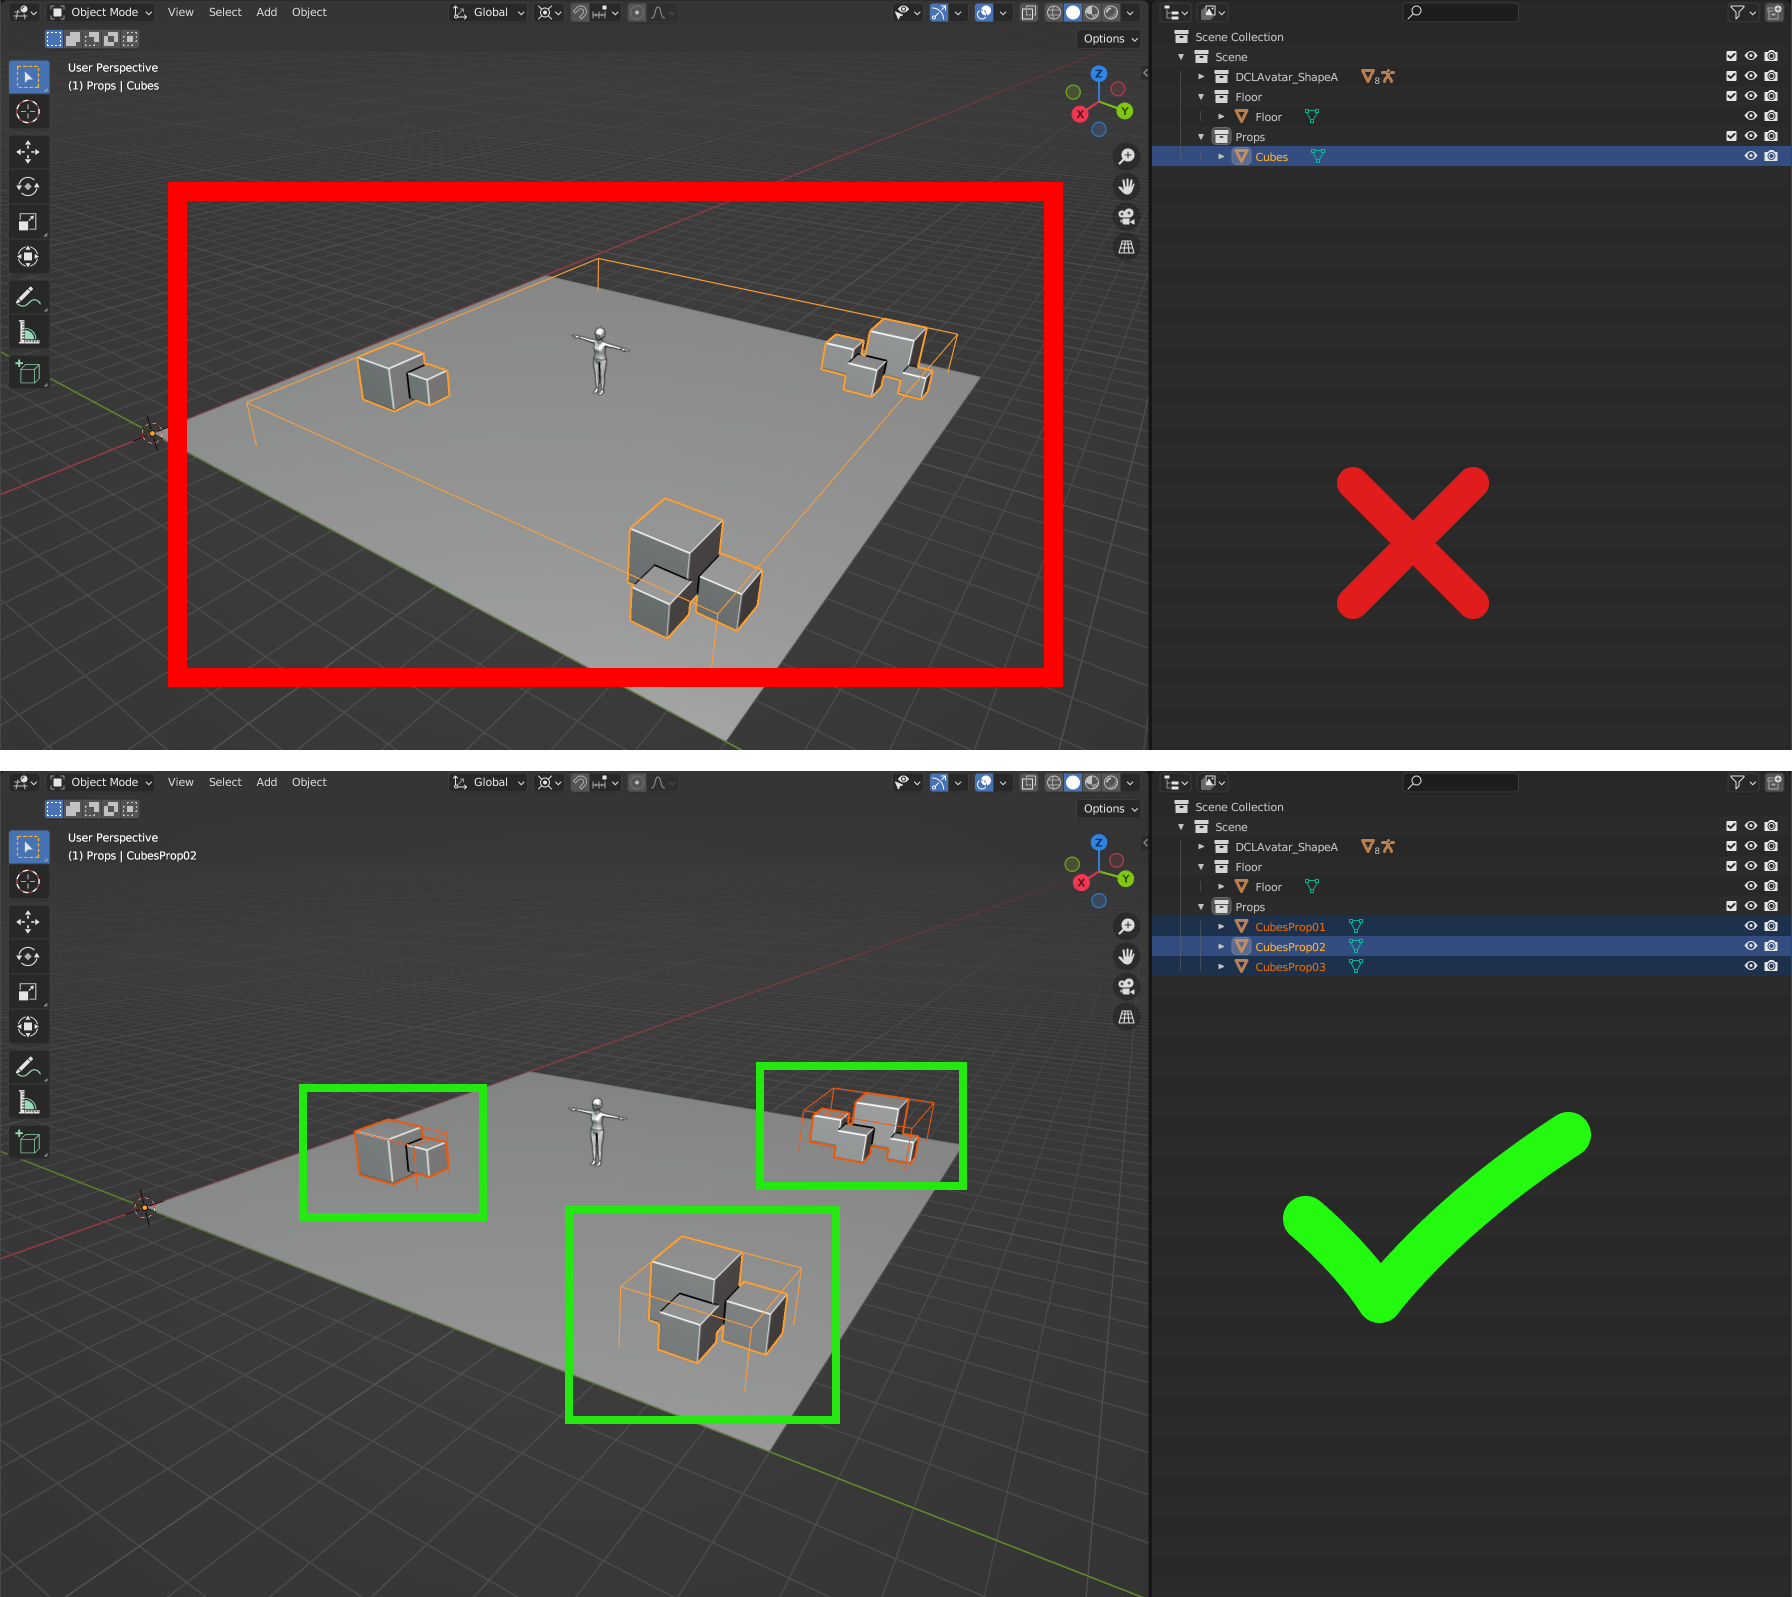
Modularity: Break down large meshes into smaller, modular parts. For example, instead of having a single mesh for an entire building, the building could be divided into separate meshes for each wall, floor, and section of the building. This allows Unity’s frustum culling to work more effectively, as only the visible parts need to be considered for rendering. It will also improve memory foot-print, because one mesh can be re-used several time for same object in different locations (to achieve this you will need to reference same mesh in your SDK7 scene definition or use instances instead of duplicated objects when exporting the scene from Blender).
-
Bounding Volume: Ensure that the bounding volume of each object fits as tightly as possible. Extraneous space in the bounding volume can cause objects to be rendered when they’re not visible.
What is Frustrum Culling? #
Frustum Culling is an optimization technique that disables the renderers (meshes) for objects that are outside the camera’s viewing area. See these 2 examples:
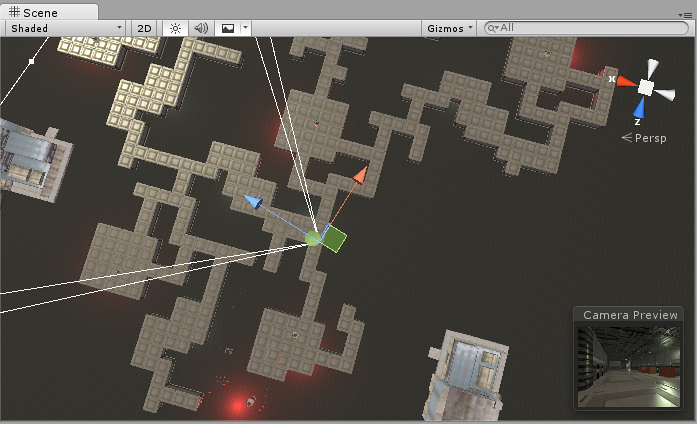
A maze-like indoor level. This normal scene view shows all visible Game Objects.
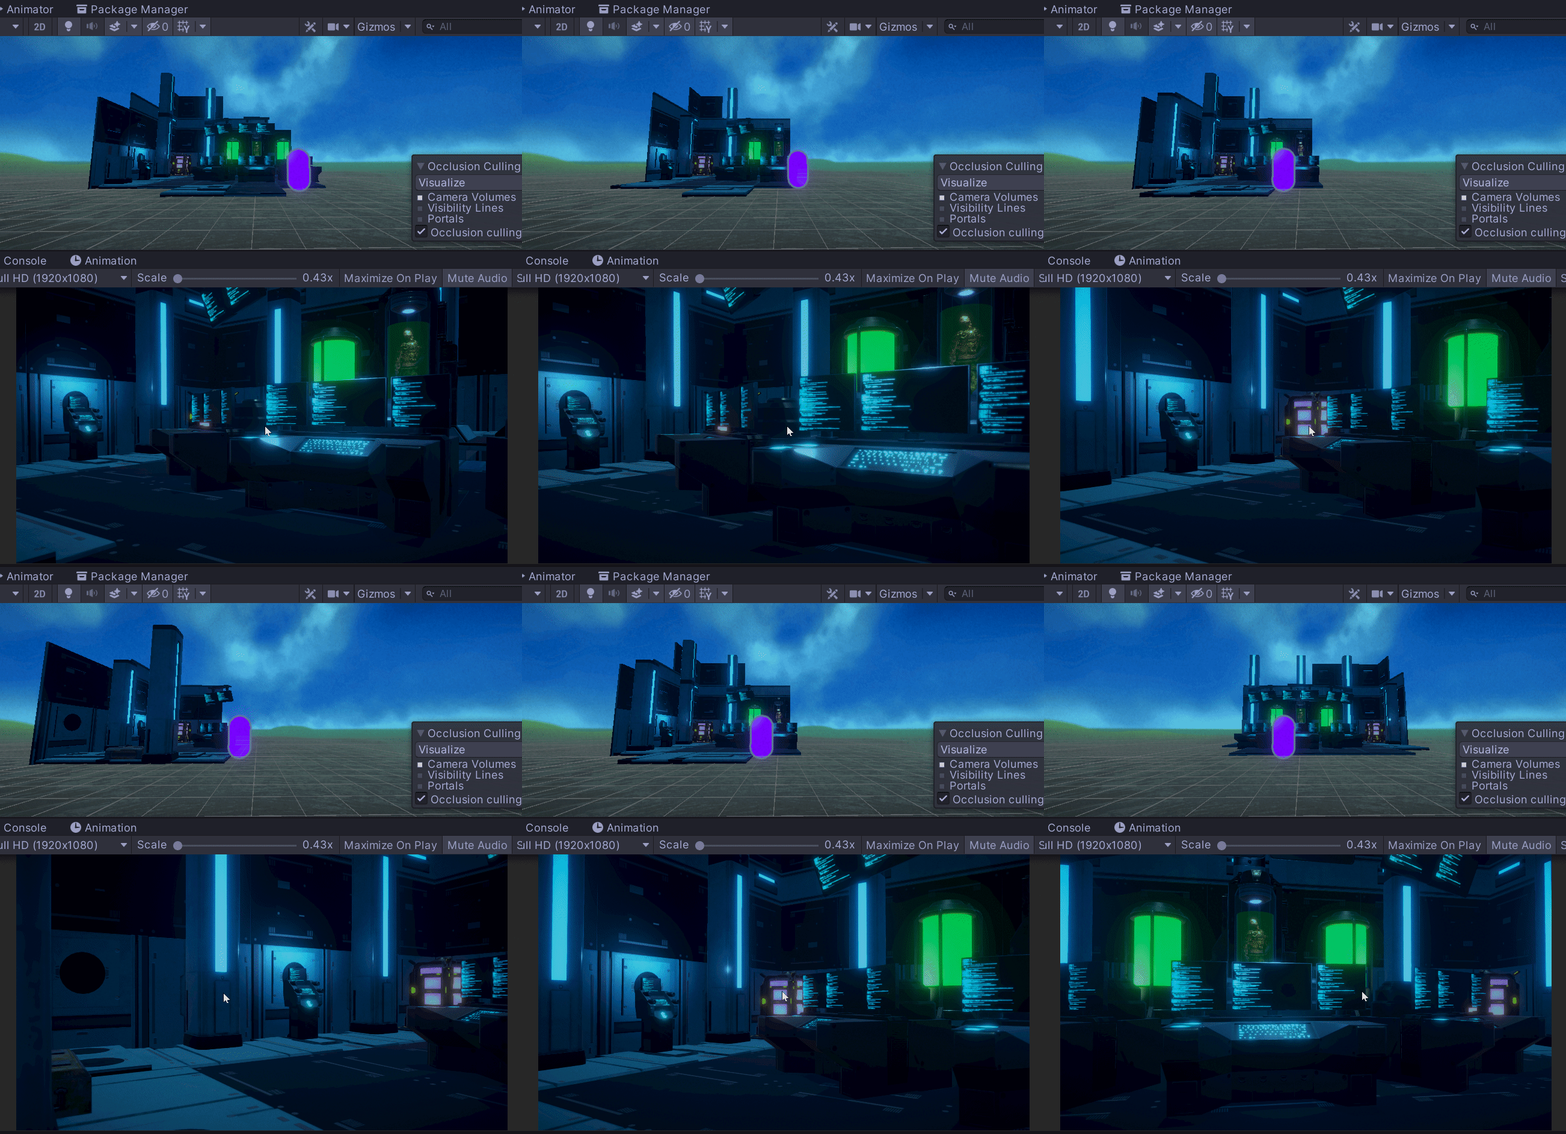
Regular frustum culling only renders objects within the camera’s view. This is automatic and always happens.
Instancing Objects vs Duplicating Objects #
In Blender, duplicating an object creates a completely separate copy of the object, while instancing an object creates a duplicate that shares the same data as the original object.
When an object is duplicated, it creates a new object with a completely independent set of data, including all of its geometry, materials, and animations. This means that any changes made to the original object will not be reflected in the duplicate object, and vice versa.
On the other hand, when an object is instanced, any changes made to the original object will be reflected in all of its instances, and vice versa. This is because all of the instances share the same underlying data.
In terms of performance, instancing can be much more efficient than duplicating, especially when working with complex scenes or large numbers of objects. This is because instancing uses less memory than duplicating, since it doesn’t create new data for each instance. Additionally, instancing can allow Blender to optimize the rendering process by treating all of the instances as a single object, rather than rendering each duplicate separately.
Overall, instancing can be a powerful tool for improving performance and workflow efficiency in Blender and on your Decentraland Scene, especially when working with large, complex scenes.
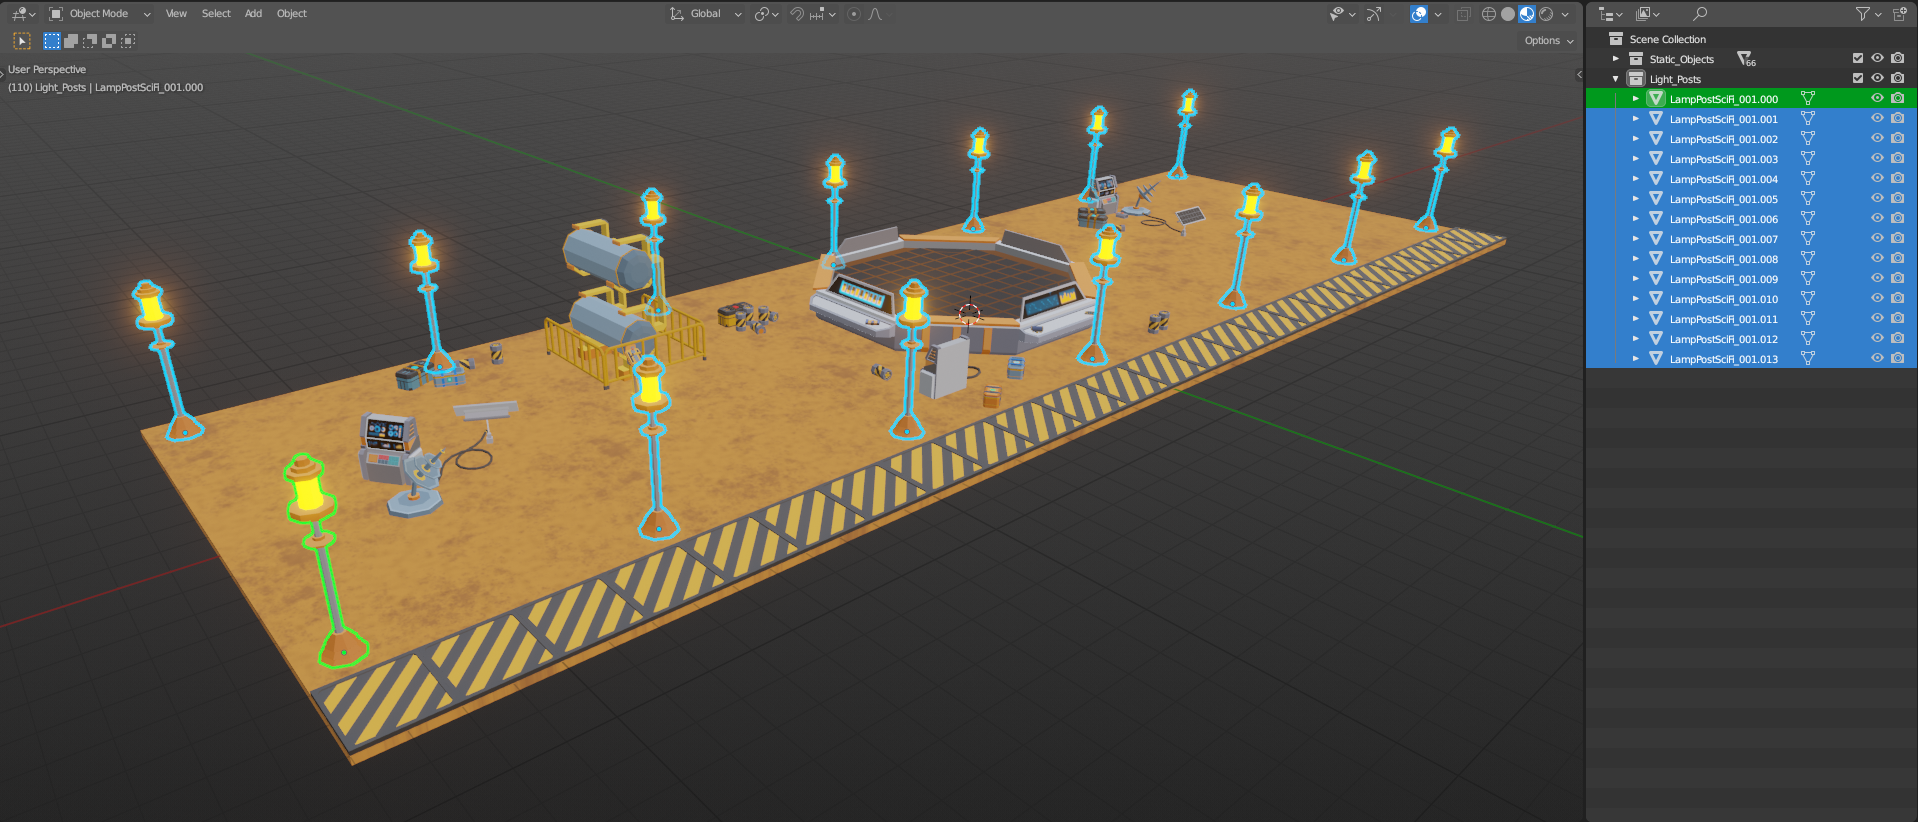
In some cases, when duplicating objects like trees, plants, and light posts, instancing can significantly improve performance compared to duplicating them. For example, this scene has fourteen light posts, all of them are exactly the same. We know that each light post has two different textures, one for the post and another one for the light. So in this case we will have two draw calls, one per texture.
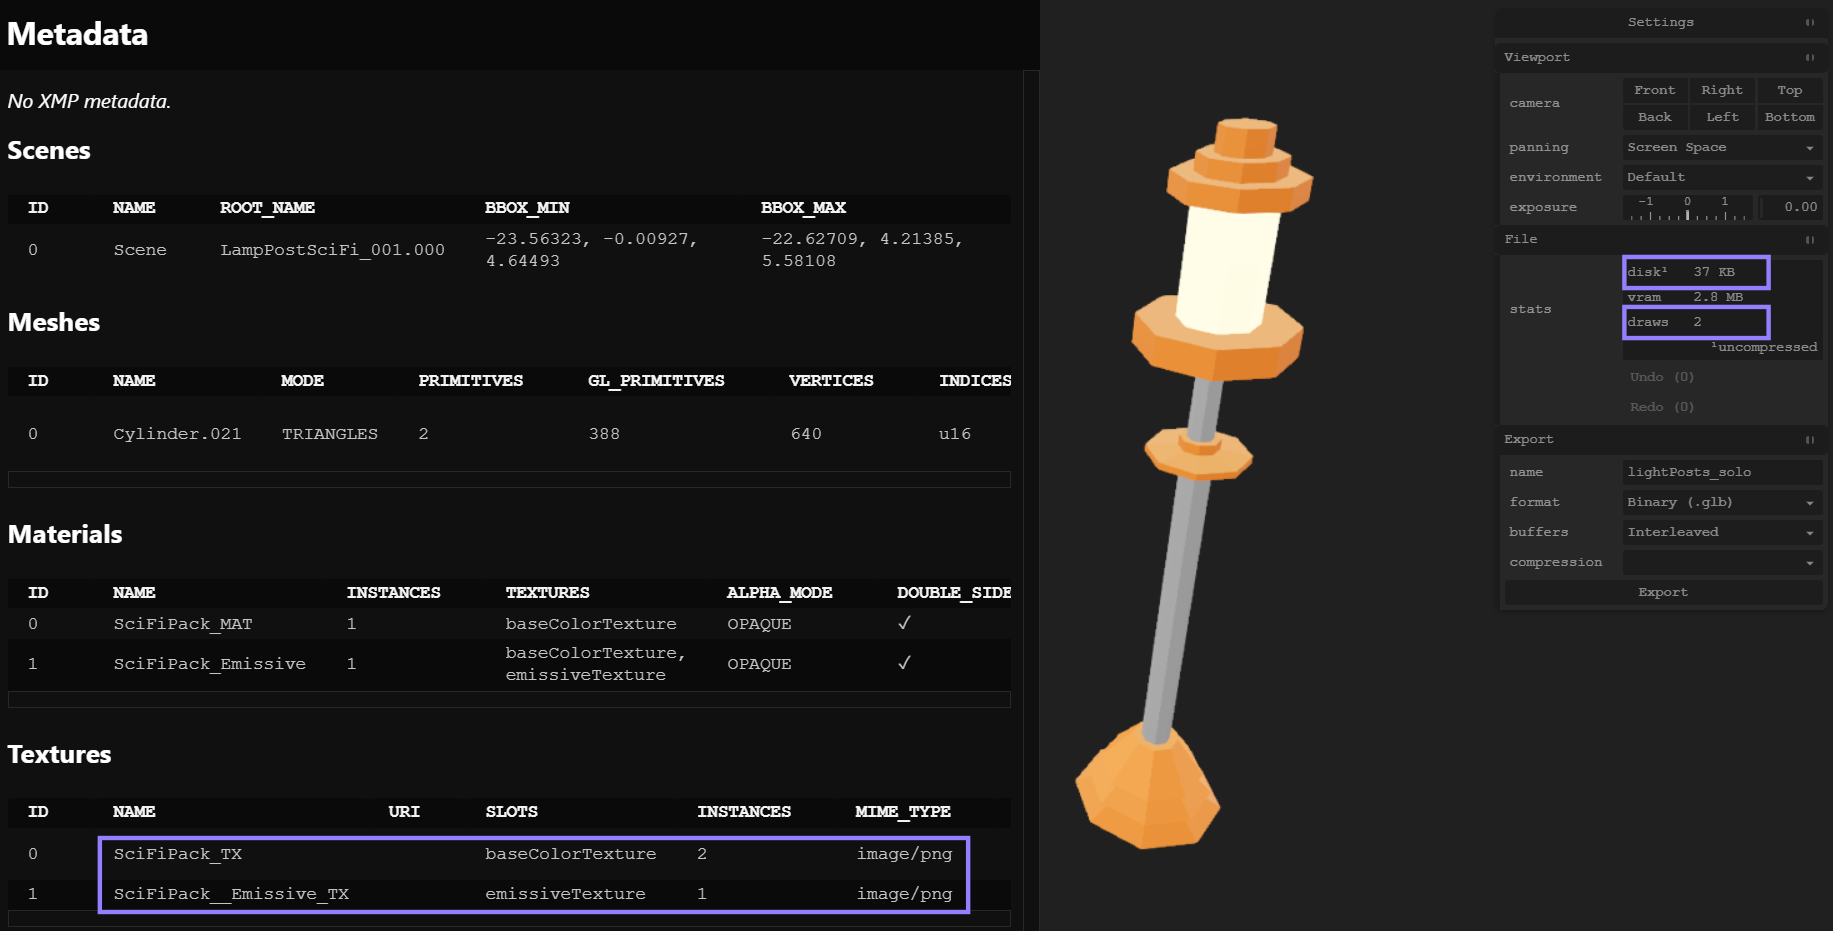
On Blender, when you are at the stage of cloning and positioning elements on the space, you have three options. Duplicate, Instance or Merge objects.
Let’s analyze what are the pros and cons of each procedure.
Duplicate Objects #
| Menu: | Object ‣ Duplicate Objects |
|---|---|
| Hotkey: | Shift-D |
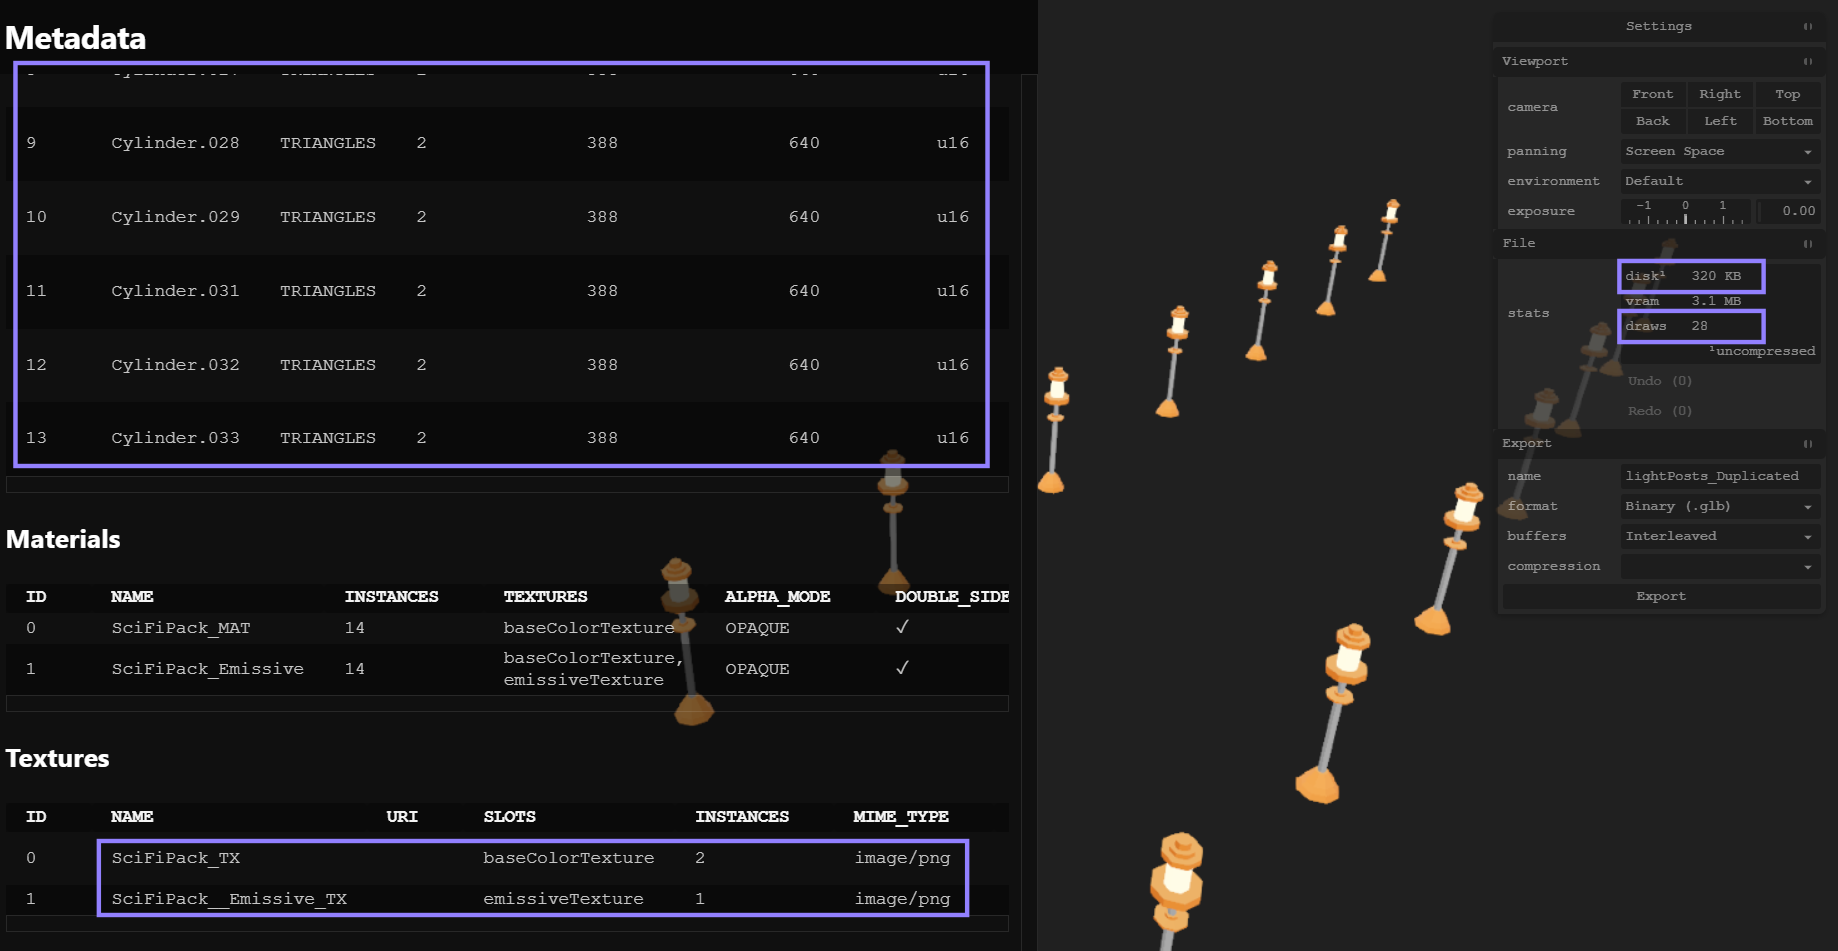
This will create a visually-identical copy of the selected object but they will be treated as different objects. So when you export it will have 2 draw calls per object, 2 * 14 = 28 draw calls, and a total disk usage of 320kb.
Instancing Objects #
| Panel: | Toolbar ‣ Tools ‣ Edit ‣ Duplicate Linked |
|---|---|
| Menu: | Object ‣ Duplicate Linked |
| Hotkey: | Alt-D |
This will create a new object with all of its data linked to the original object. If you modify one of the linked objects in Edit Mode, all linked copies are modified. Transform properties still remain copies, not links, so you still can rotate, scale, and move freely without affecting the other copies.
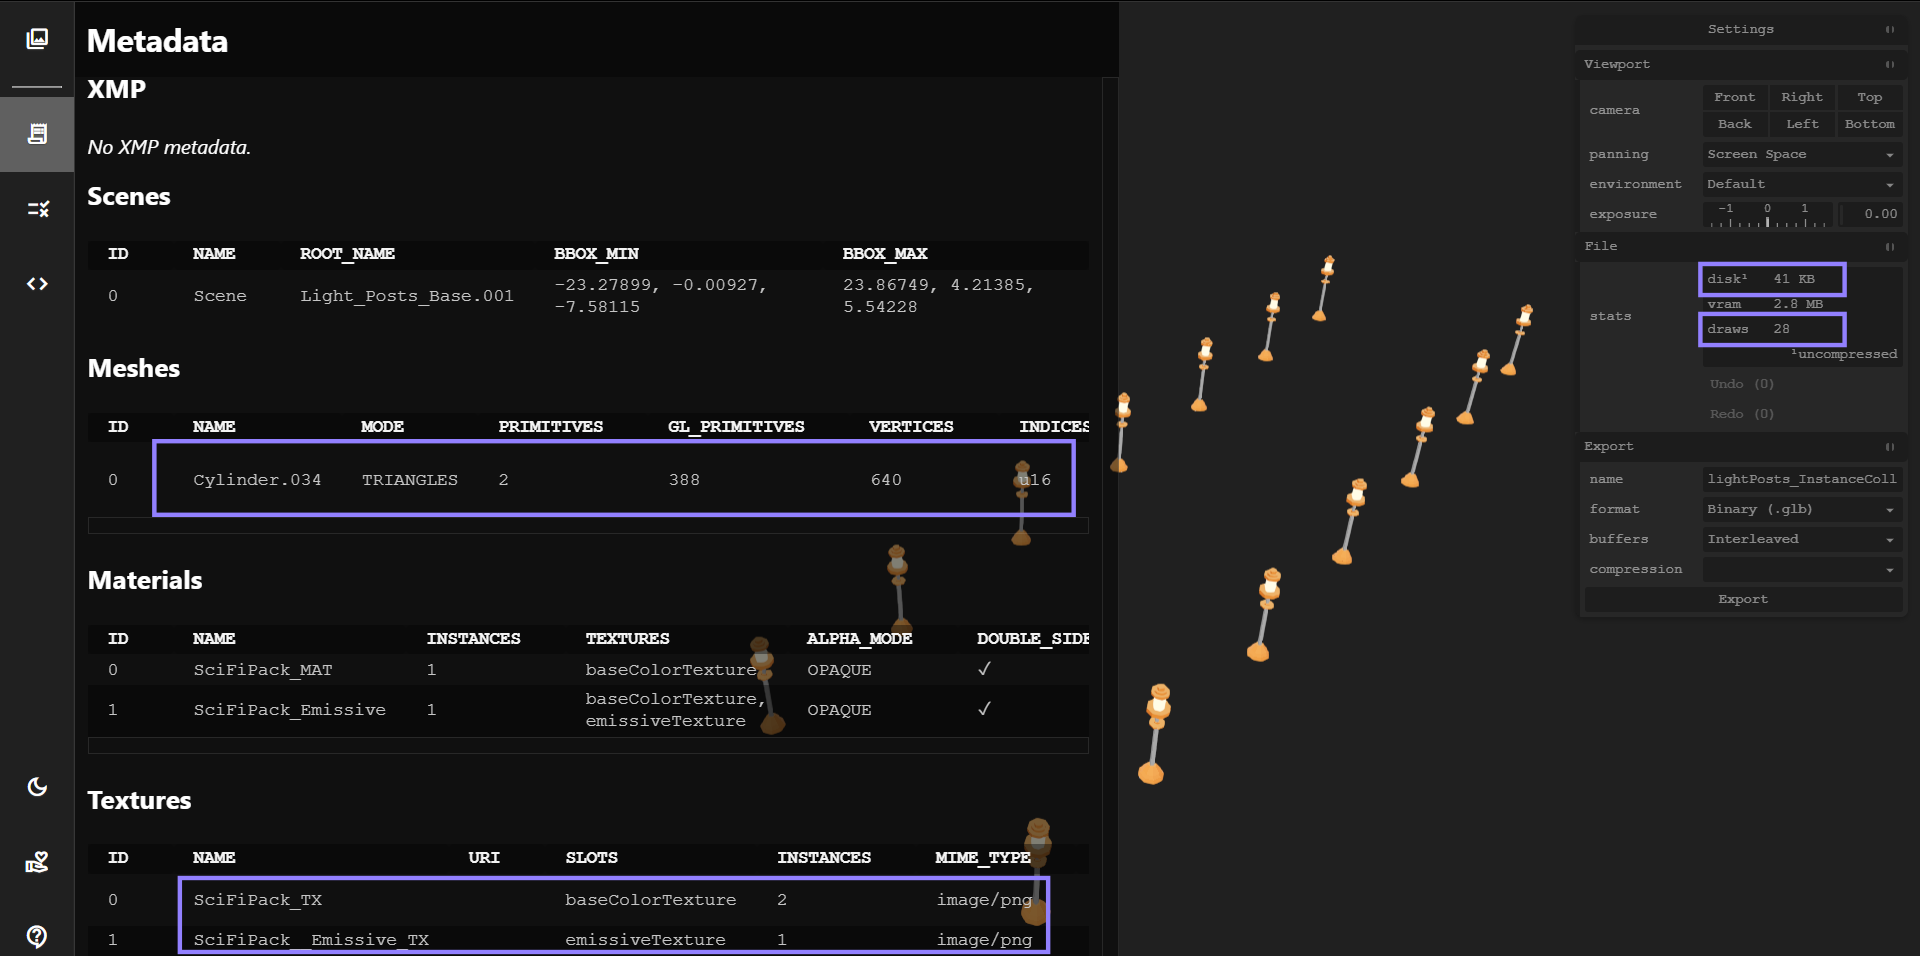
When we export these models, we will still have the same number of draw calls (28). However, note that we now have only one mesh, which significantly reduces disk usage (41 kb).
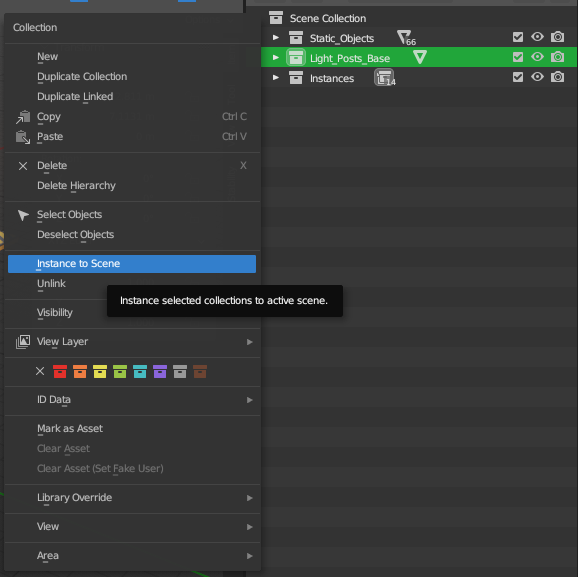
To keep things organized you can simply instance collections in your scene, this way allows you to control all instances from one single folder and source.
Mesh Naming #
Use meaningful names for your meshes. Name should give context of where the asset is used or to which part of the object it relates.
For asset naming use mix of PascalCase and snake_case, which we can call PascalSnake_case. Basic rules there - new word or word after separator (_) starts with Capital letter.
- Use meaningful names for your meshes
Examples:
🟢 Prefer names -
Theater,Tram🔴 Avoid names -Untitiled.008,primitive(1),Cylinder.091,_sphere-AB - Use underscore
_as a separator to bring more context to the name. Put more common things first and specifics at the end. Examples: 🟢 Prefer names -FountainStatue,TheaterMainWall,TramWheelLeft🔴 Avoid names -North_MainWall_Theater,Tram_LeftFront_Wheel
If there is more than one object with the same name add a number after the word: FountainStatue01, FountainStatue02, etc.
Tools For Creating Models #
There are lots of addons and externals tools that facilitate the work when creating assets to make the pipeline faster and more efficient, some of they are free and some to purchase, to name a few:
Decimate #
This is a well known modifier that can be used to reduce the amount of tris of your mesh while keeping the surface structure of the model. While this is a very powerful tool to optimize models take into account that once the model is decimated the topology may be affected causing a bad topology (because it breaks the geometry into unpredictable pieces). In another hand, decimation will convert the quads of your mesh into triangles making it difficult to modify it after being used. In that regard decimation can be useful for static models but is not preferred for animated models.
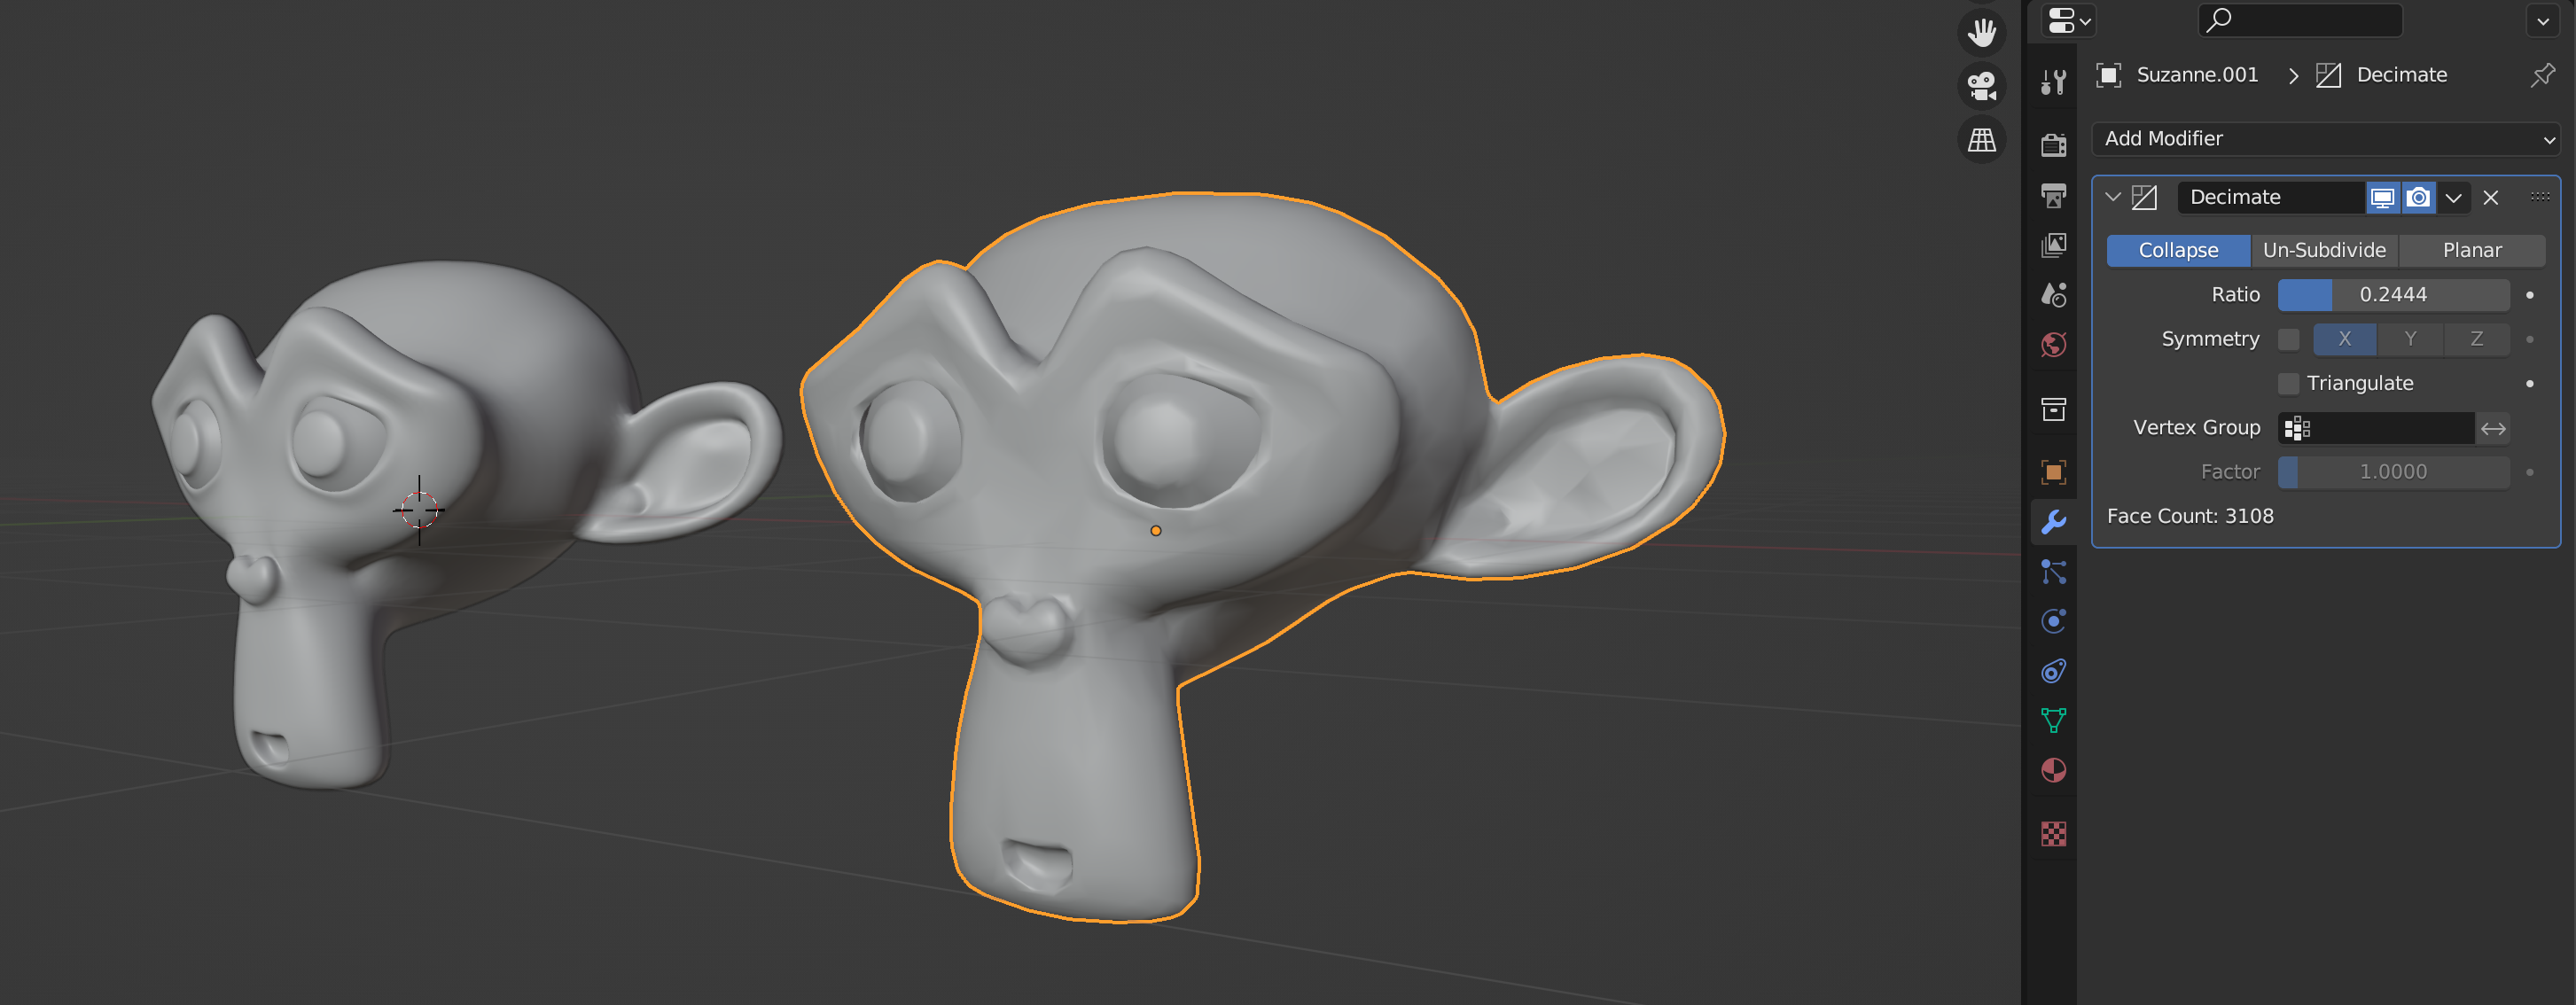
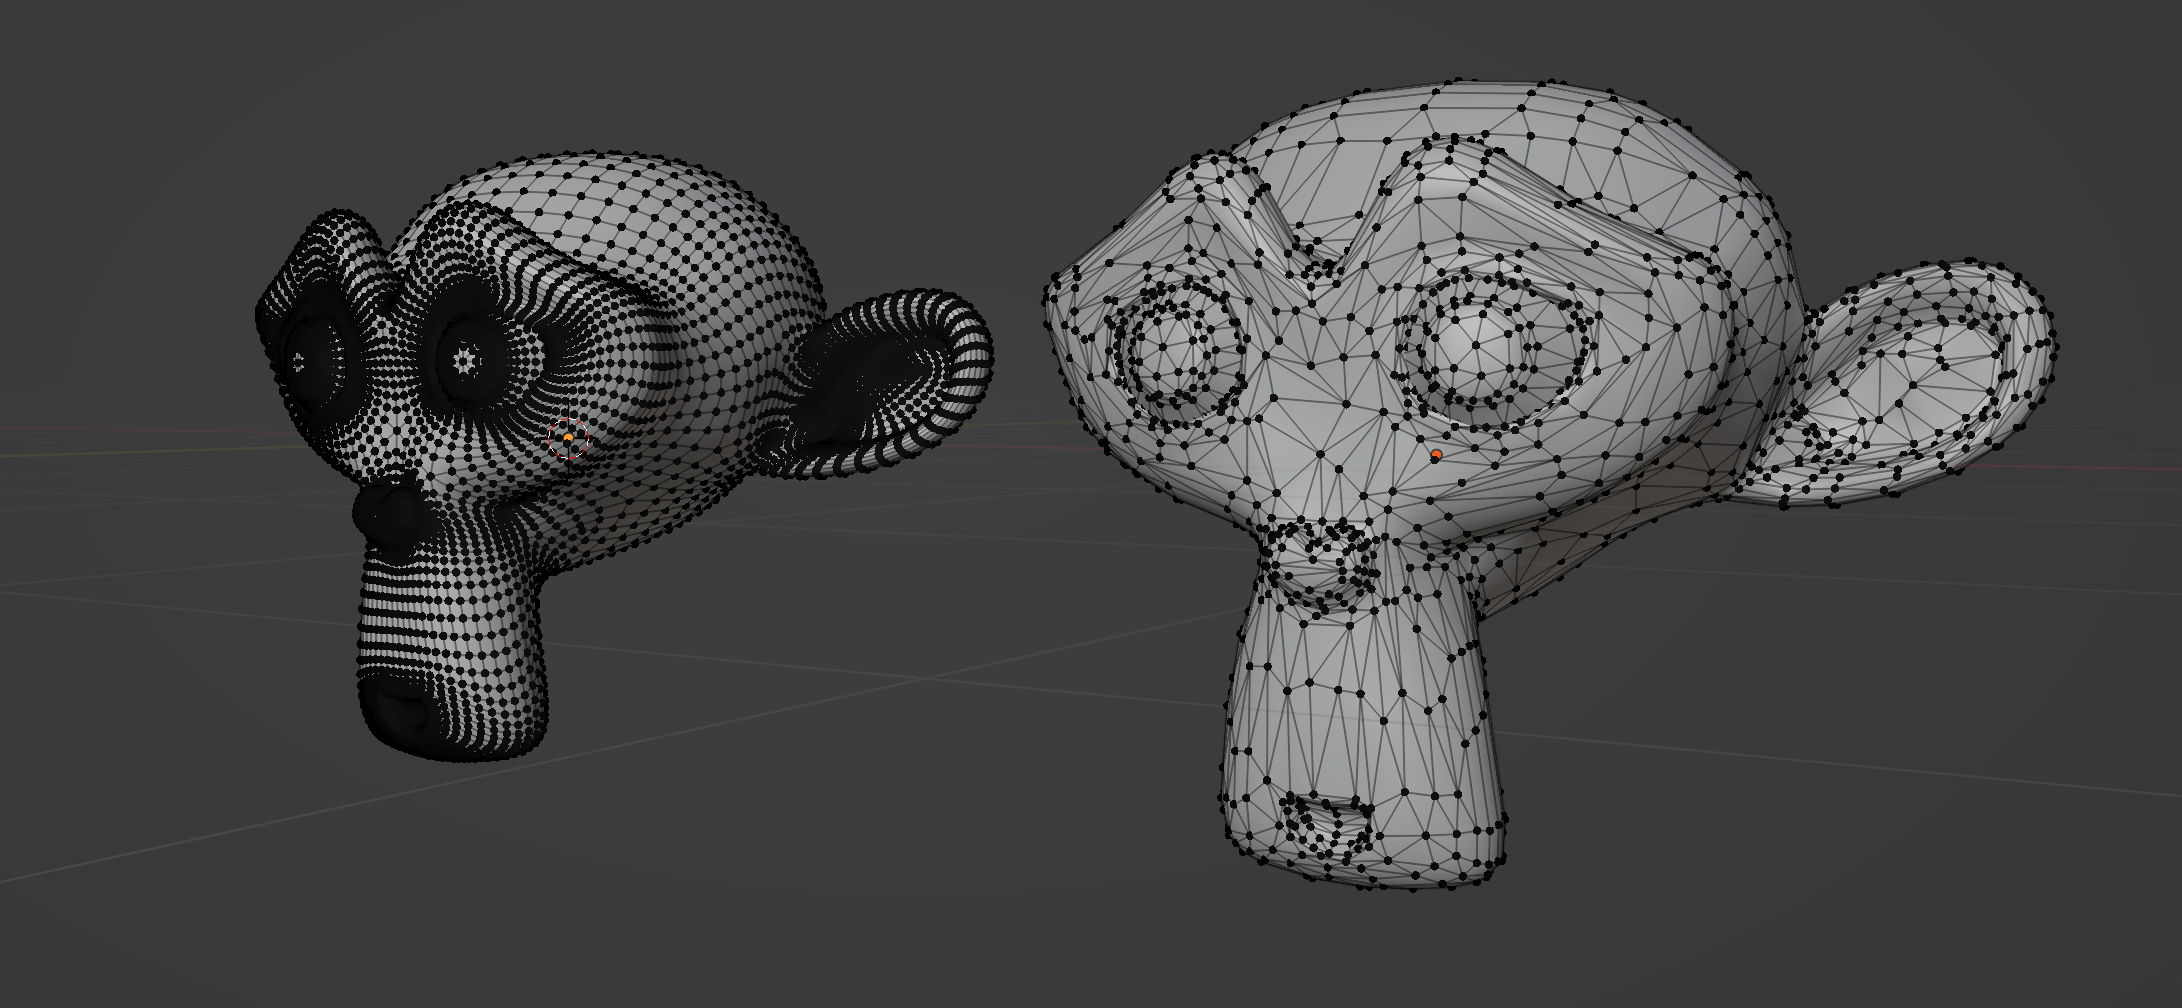
Another way to optimize your meshes using decimation is to decimate the model and then do a proper retopology. This way you can assure a more predictable result and clean topology.
Some retopology addons that can be useful are (some of them are paid):
- Simplygon: https://www.simplygon.com/
- Speedretopo: https://blendermarket.com/products/speedretopo?ref=2
- Retopoflow: https://blendermarket.com/products/retopoflow
Mirror Modifier #
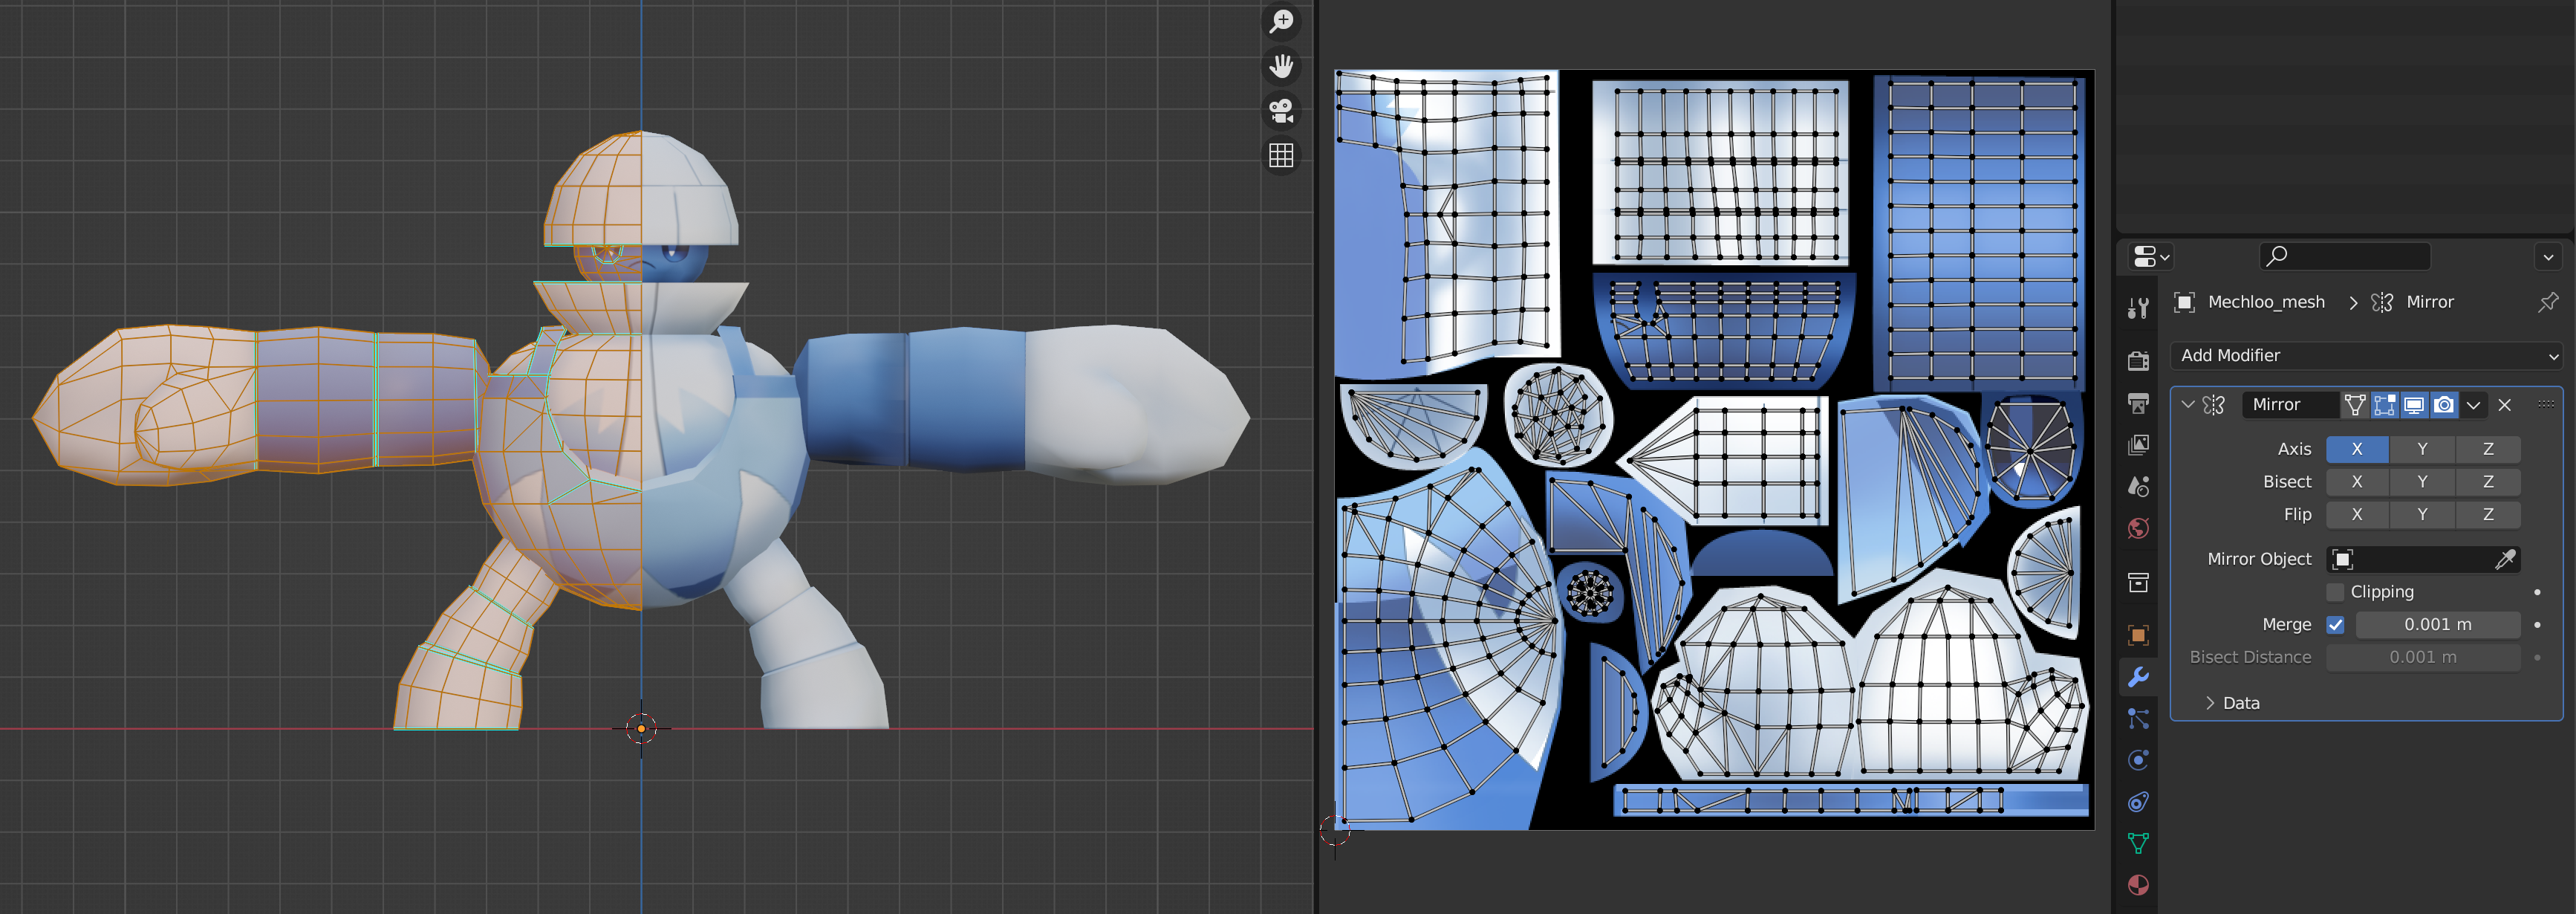
The Mirror Modifier in Blender is a tool used for creating symmetrical models by mirroring one half of an object to any direction (X,Y,Z). It’s a great tool when you have symetrical models because it reduces the time of 3D modeling, doing UV Unwrapping (because you will need only to unwrapp one part of the model and the rest will share the same UV coordinates) and also optimize your textures avoiding wasting texture resolution on parts that are essentially mirrored.
Batch Rename #
A very handy tool to change name conventions in an easy way is using the Batch Rename that Blender has integrated in their toolkit. To access it go to Edit and then Batch Rename.
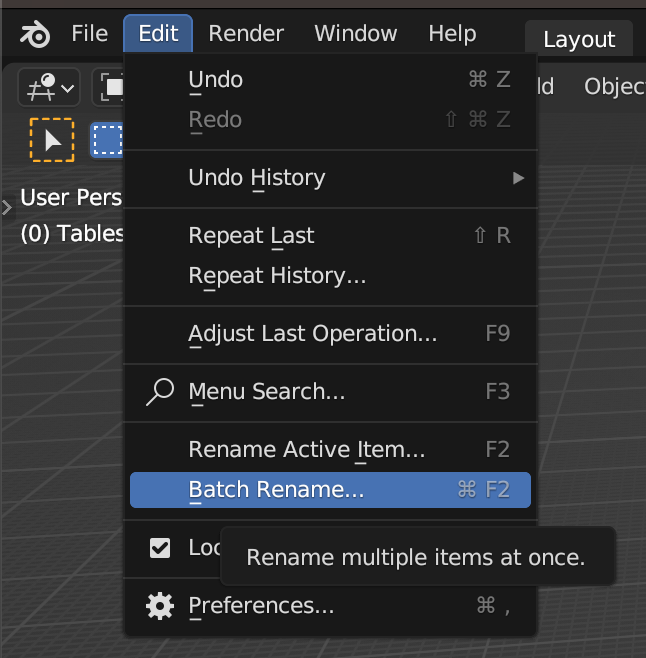
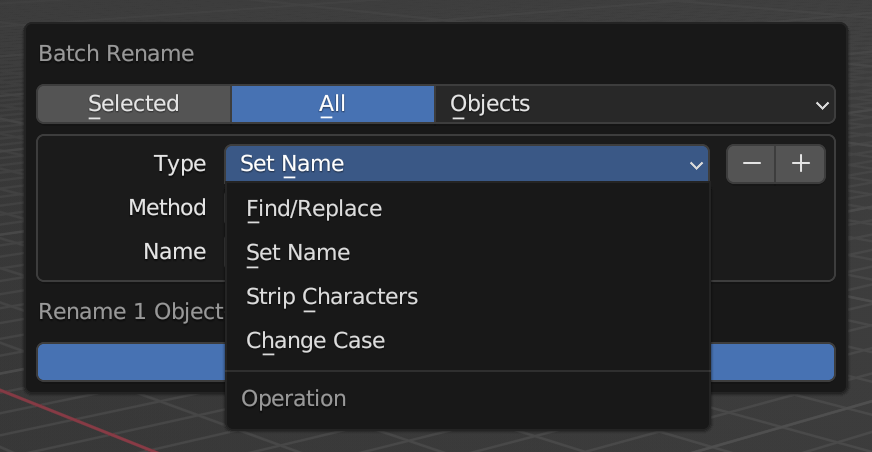
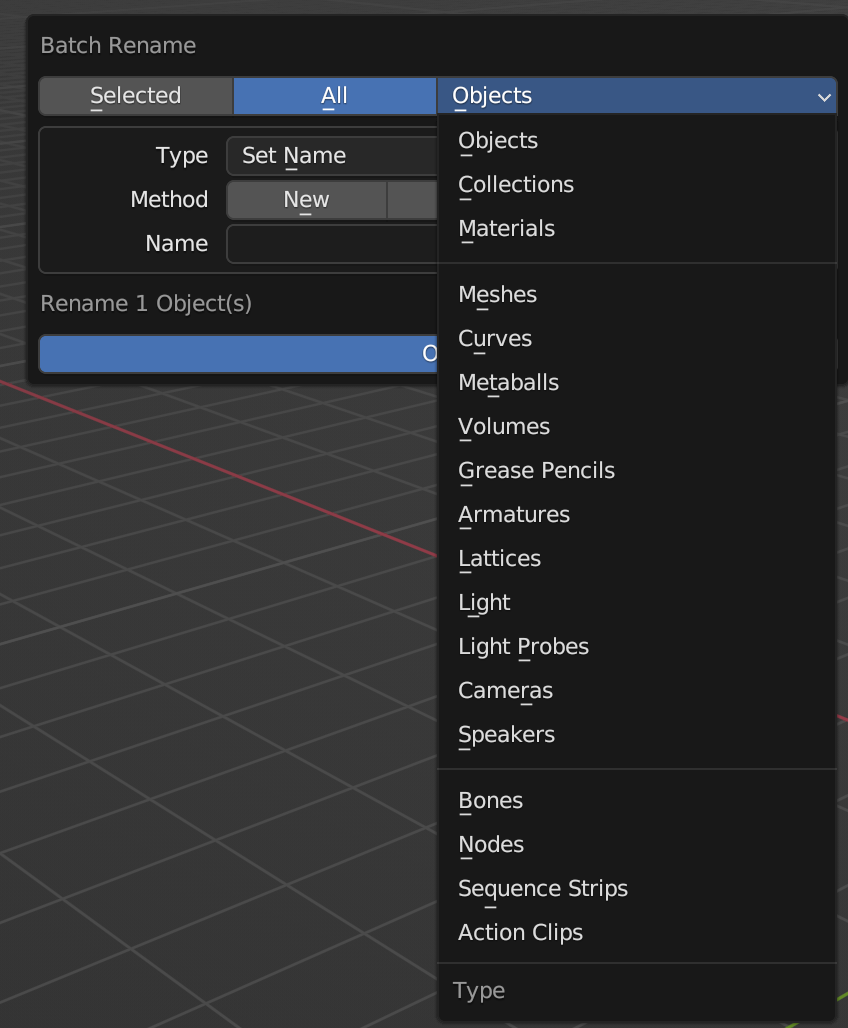
Select the objects you want to change the name and just replace the default object name for the new one. This tool provides different methods and type of asset to rename so it’s very flexible to change the names also for meshes, animations, bones, etc.
Best practices for geometries # #
- Be mindful of how many faces you add to your 3D models, as more faces make its rendering more demanding. See scene limitations for the limits imposed by a scene.
- Make sure there are no hidden faces that can’t be seen but that add to the triangle count.
- For shapes that should have rounded sides, set them to be smooth rather than adding additional faces.
- Make sure the normals of all faces are facing outwards instead of inwards. If there are faces in your model that seem not to be there when you render it, this is most likely the cause.
- Bake the rotation and scale of your meshes, so that their bounding boxes don’t extend out unnecessarily.